Table of Contents
Follow these instructions to help configure your Pfsense for Virtualbox.
You can find the link to download Pfsense here.
Step 1:
In order for you to download the appropriate file to import into VirtualBox, make the appropriate selections inside of the downloader box. Once your file is downloaded use a program such as 7zip to extract the .iso file.

Step 2:
Once you have your .iso file of pfsense, head over to VirtualBox Manager. From here you can either select Machine menu and new. Or the blue new button to the right.

Step 3:
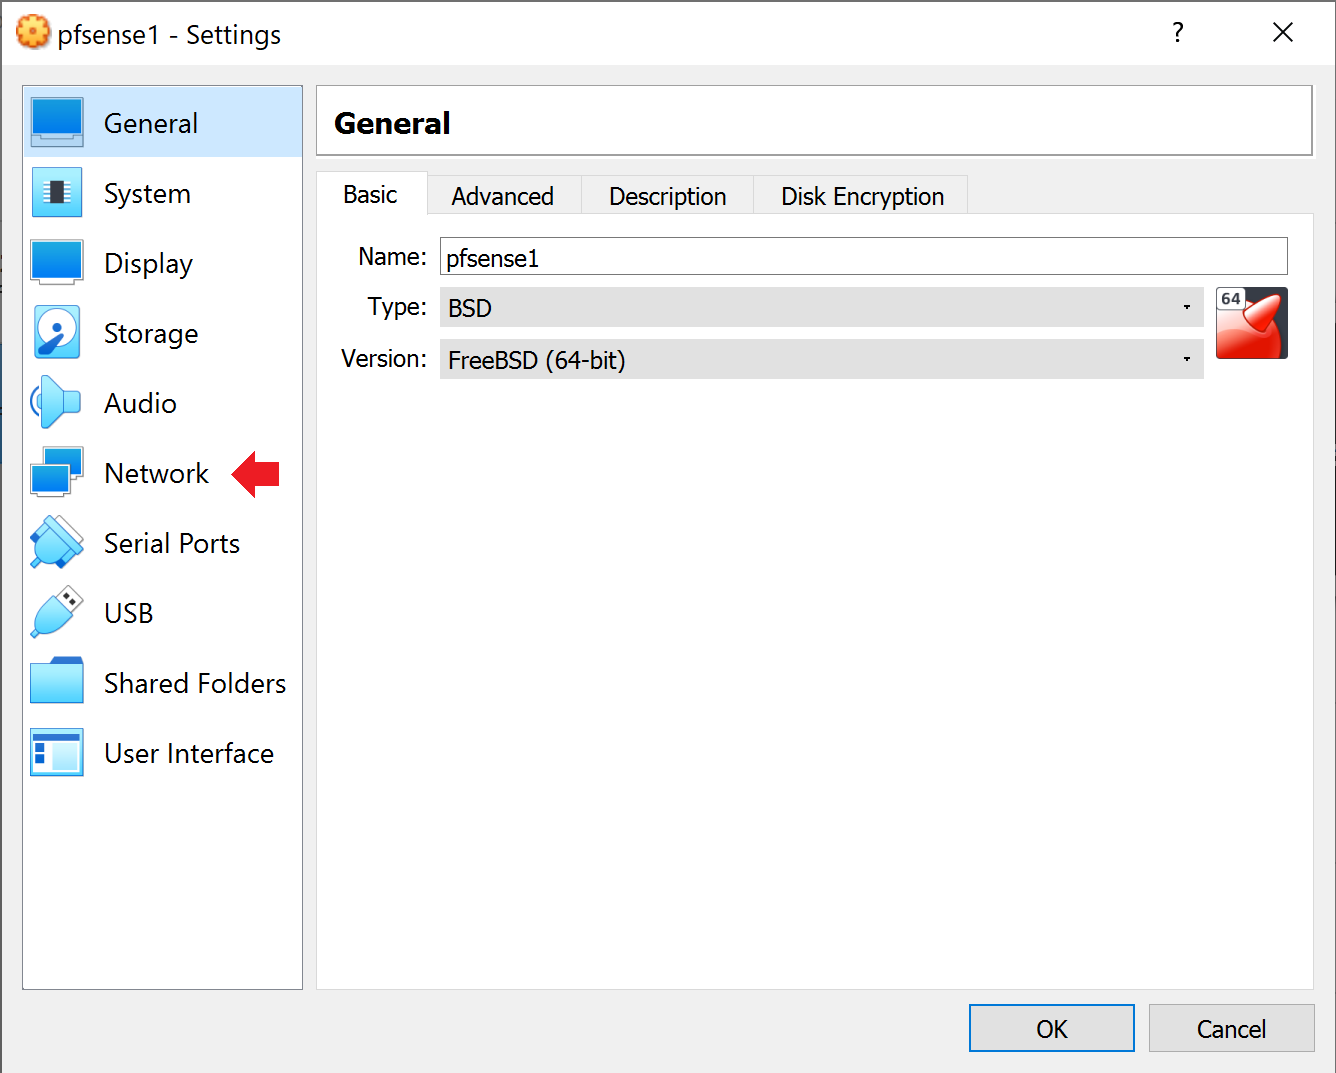
We now have to create a new virtual machine. Choose a new name for your pfsense machine. I chose pfsense1. Change the type to BSD and change the version to FreeBSD (64-bit). Click the yes button.

Step 4:
Click next through the screens until it asks you to press the create button.

Step 5:
Now change the selection to VMDK to create a virtual machine hard disk.

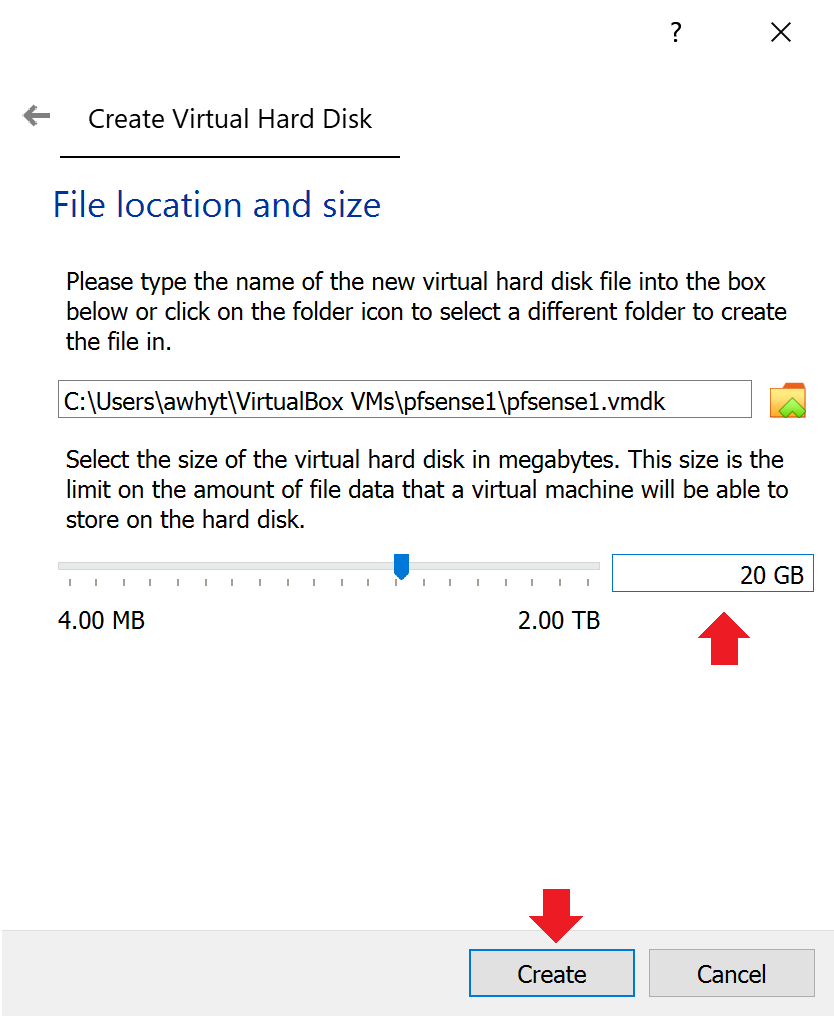
Step 6:
Continue to move through the screens until you are able to adjust the file location and size of the hard disk. I chose 20GB but it is completely your choice.
Step 7:
Now that we have created a new pfsense virtual machine, select the machine so that it turns blue and click the settings button on the upper right.

Step 8:
Now we will setup the network portion of Pfsense by clicking network on the left side of the window.
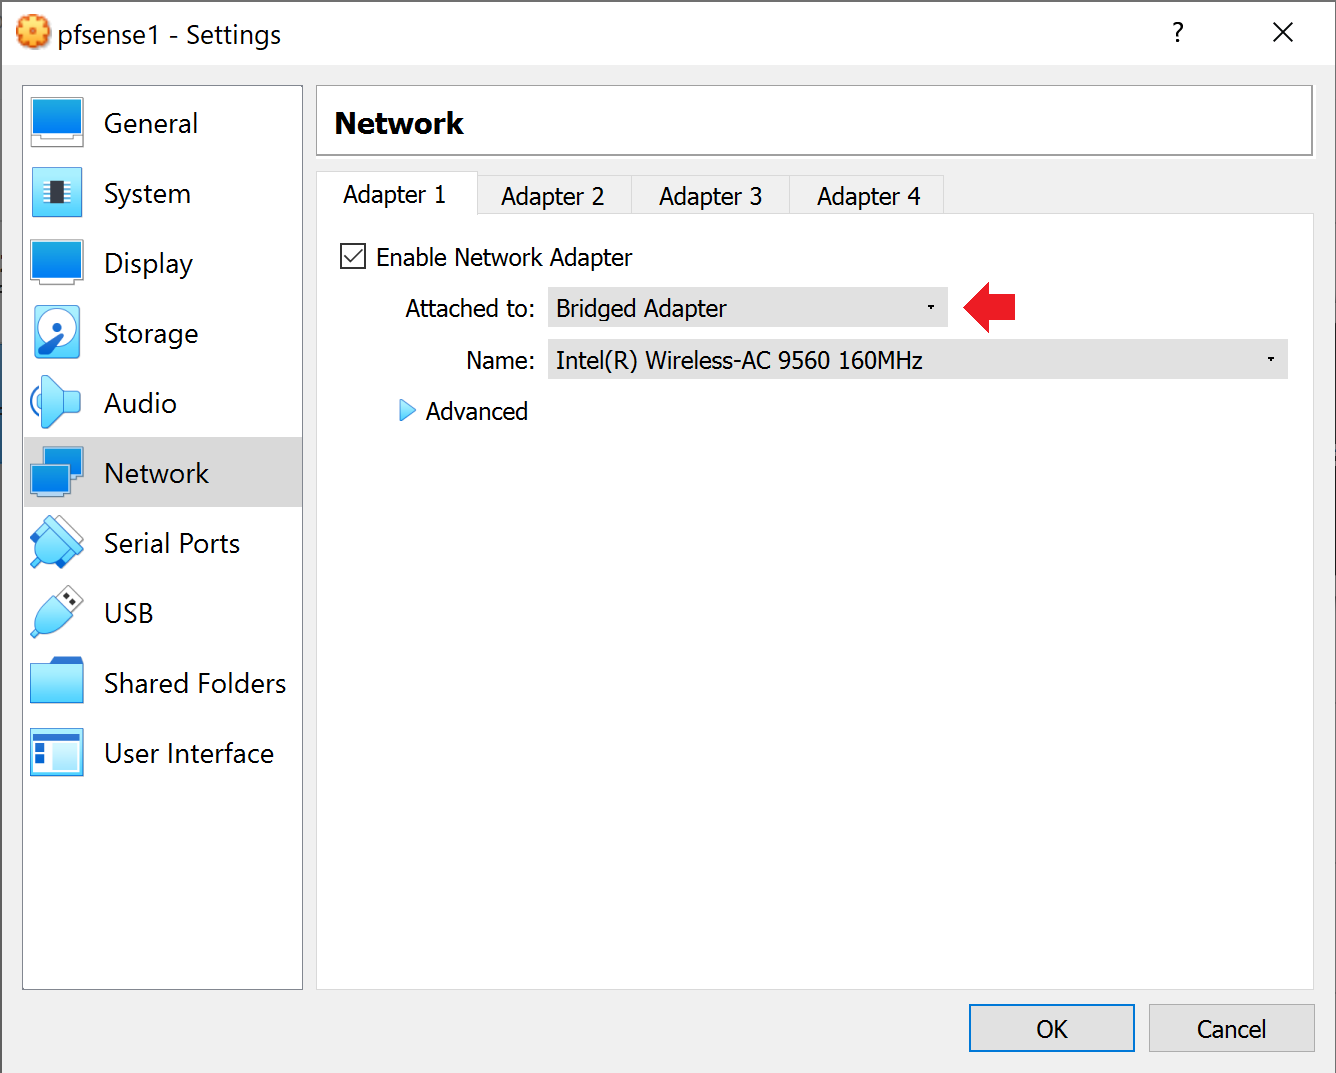
Step 9:
We will set up two different network adapters. For adapter one change the attached to drop down to Bridged Adapter. This is going to allow whatever internet connection that is going through Pfsense to to connect to the second adapter.
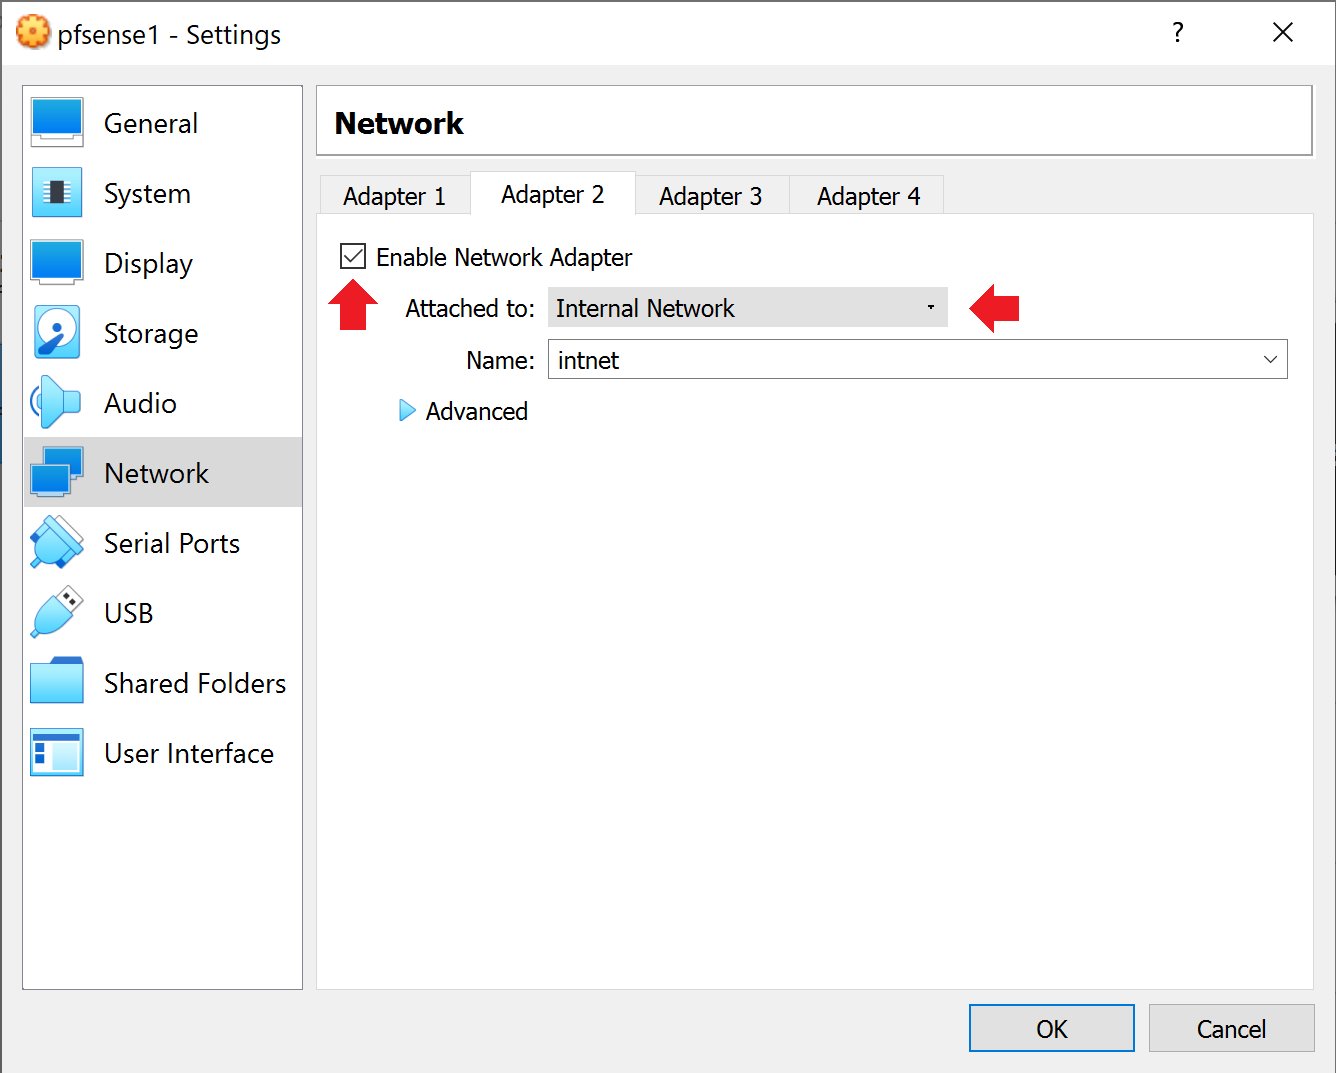
Step 10:
Enable the 2nd adapter and change the attached to drop down to Internal Network. This will allow the internet connection that is flowing through to create it’s own internal network.
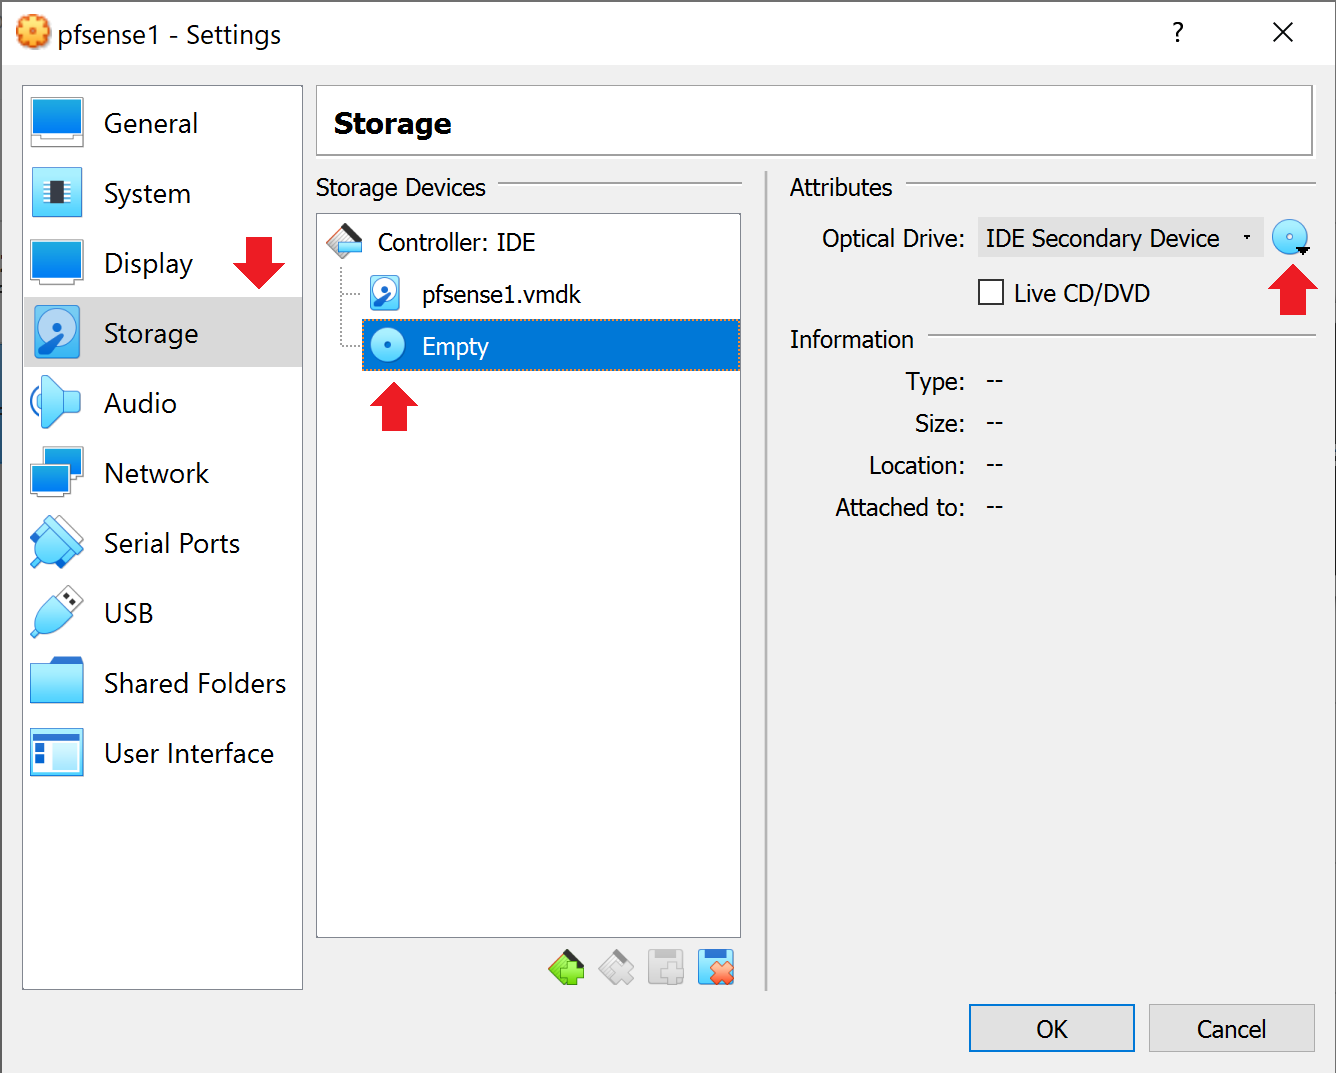
Step 11:
From there, Select storage on the left side of the window. Click empty under storage devices and under attributes click the blue disc to open a new extension window.
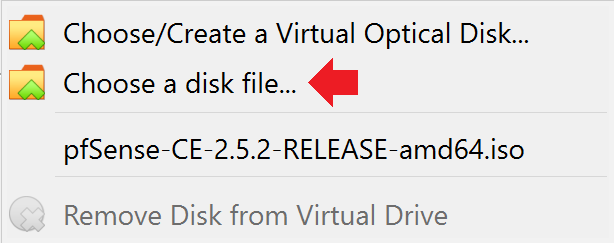
Step 12:
When the extension window pops out select choose a disk file… from the list.
Step 13:
Select your .iso file from where you extracted it. It should now show up under storage devices. Select the OK button and start your newly setup machine.

Step 14:
For the remaining portion of the install process you will be making selections by using the enter key and direction arrows on your keyboard. Continue selecting the enter key until you come to the install screen. Make sure that you have install selected and select OK.

Step 15:
Make sure that you have Continue selected and choose the select option.

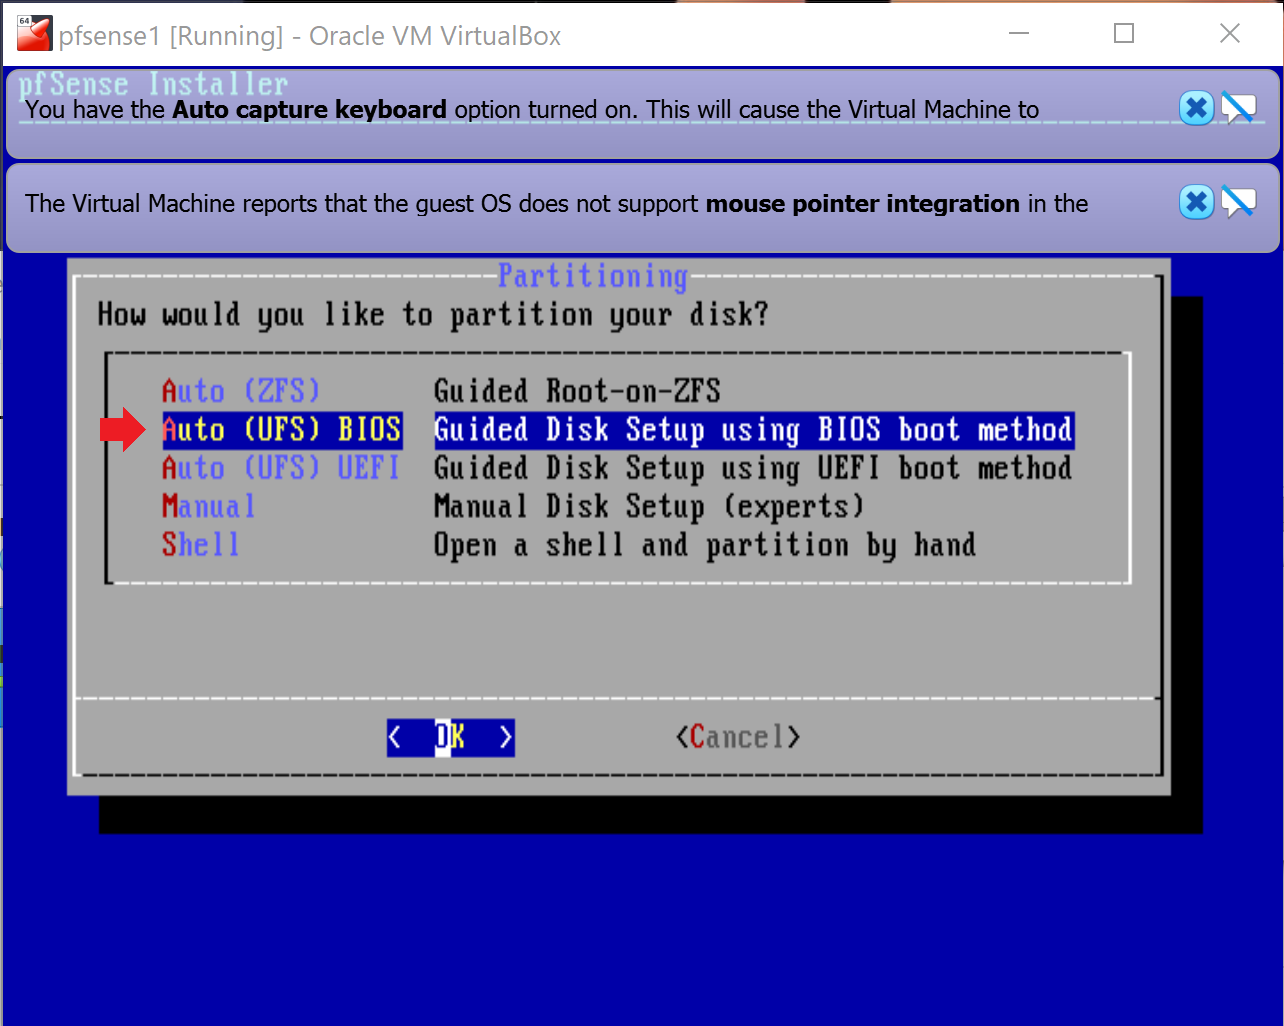
Step 16:
Now, choose auto (UFS) BIOS and the OK selection.
Step 17:
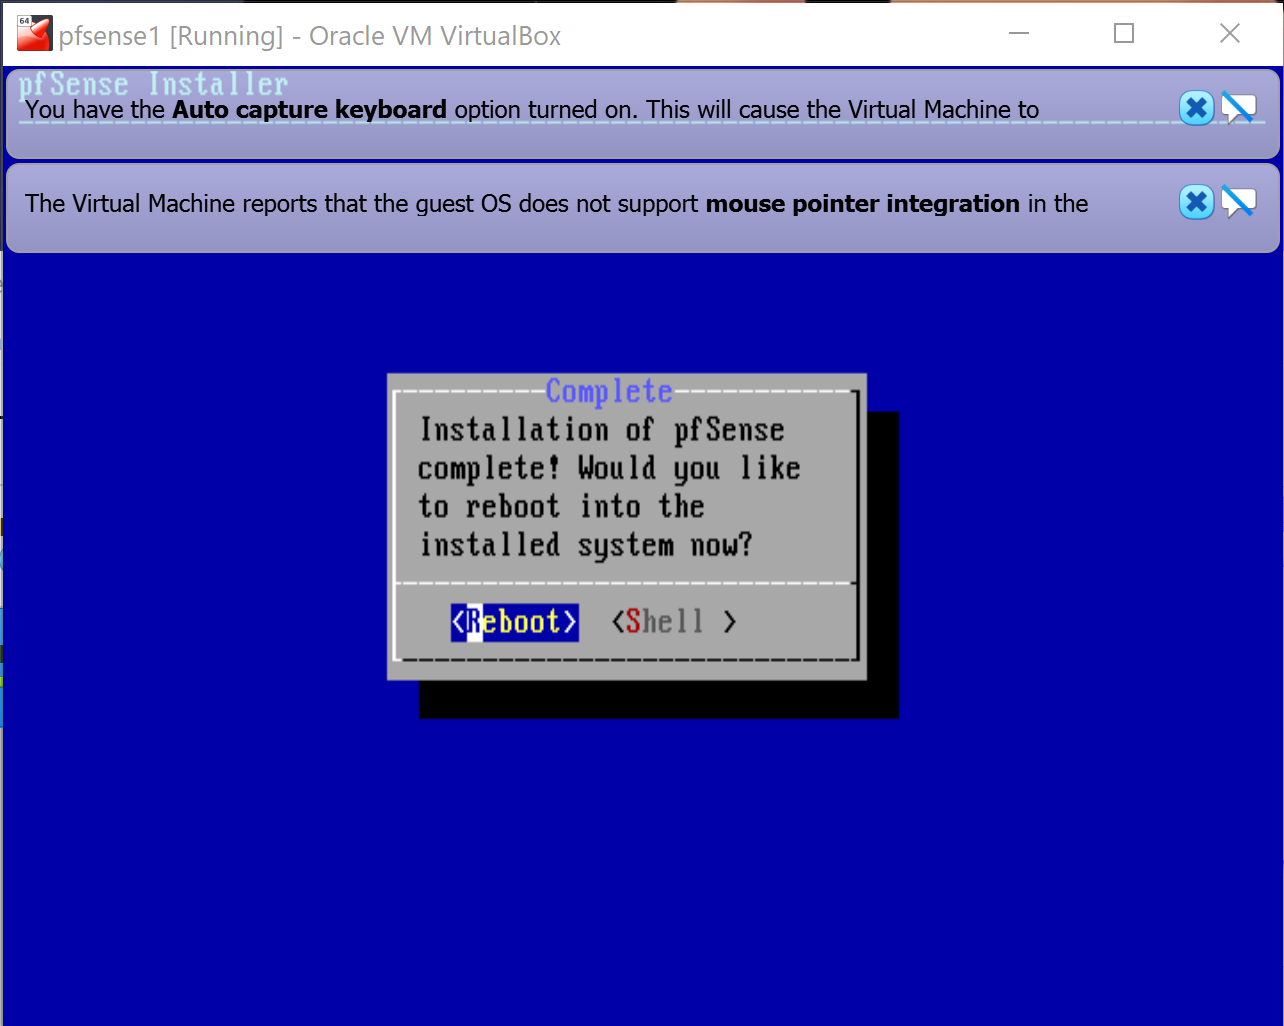
Continue forward until you come to a manual configuration window that asks if you would like to open shell. Select NO.

Step 18:
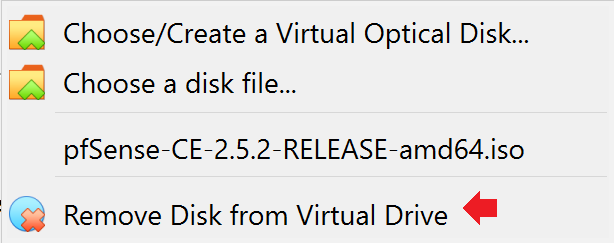
You will come to a new window that lets you know that the installation is done and want’s you to reboot. But before you do that, head back to the storage section of your VirtualBox Manager and remove the .iso file from the virtual disk drive.
Step 19:
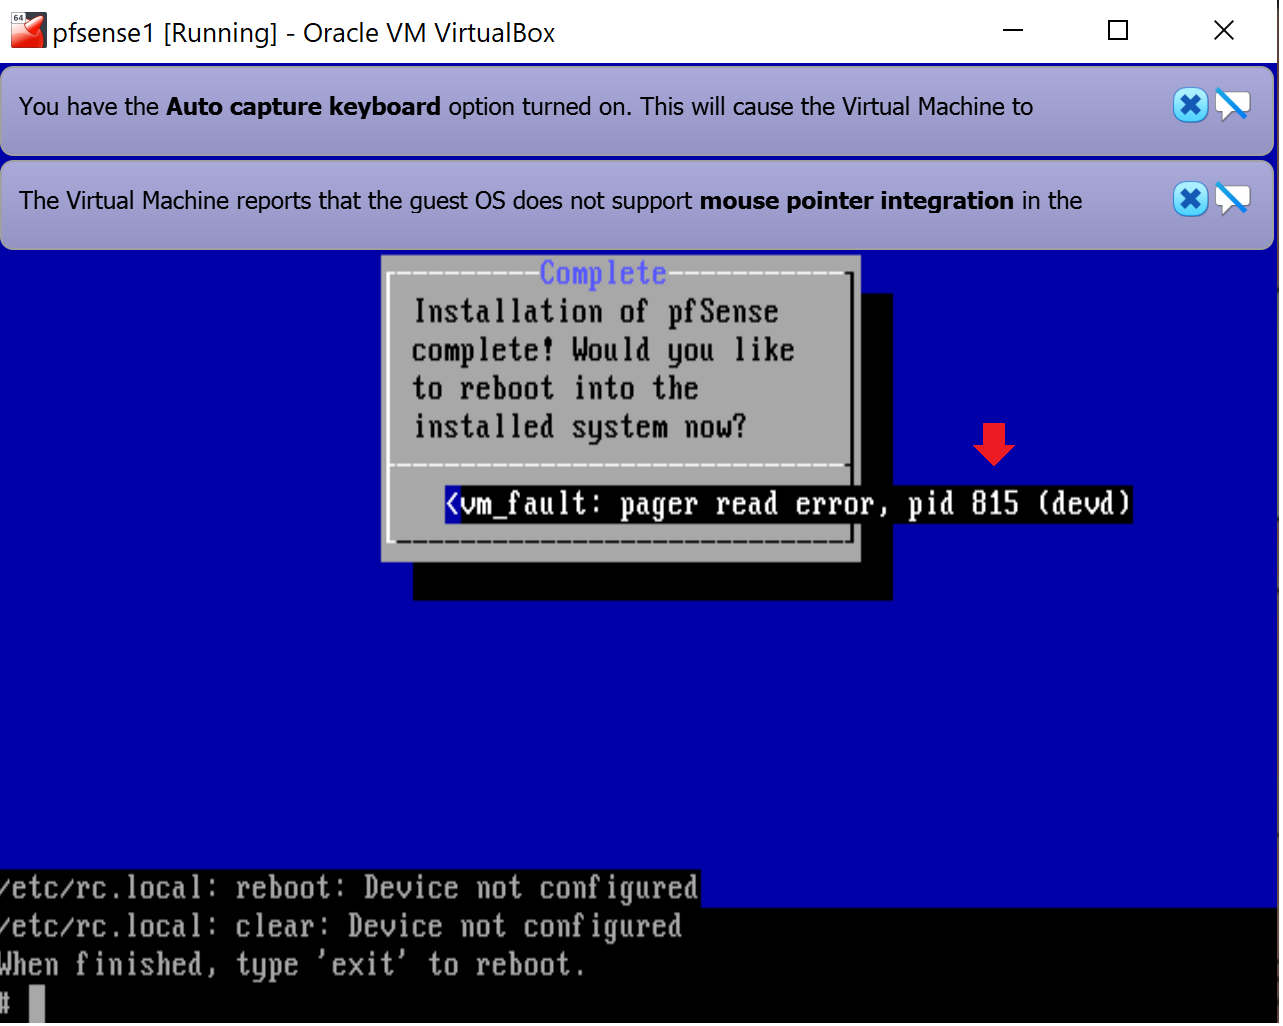
Once you remove the virtual disk you will receive an error message for removing it. That is absolutely okay. Without removing the disk the Pfsense would continue on an endless loop of installation. Continue on by hitting enter key on your keyboard.
Step 20:
The current window should finish its processing. Once that is finished, head back to your VirtualBox Manager and right click your new Pfsense machine. You will see an option that says reset. A new box will open up with a reset button. Press it. This will reload your Pfsense machine.

Step 21:
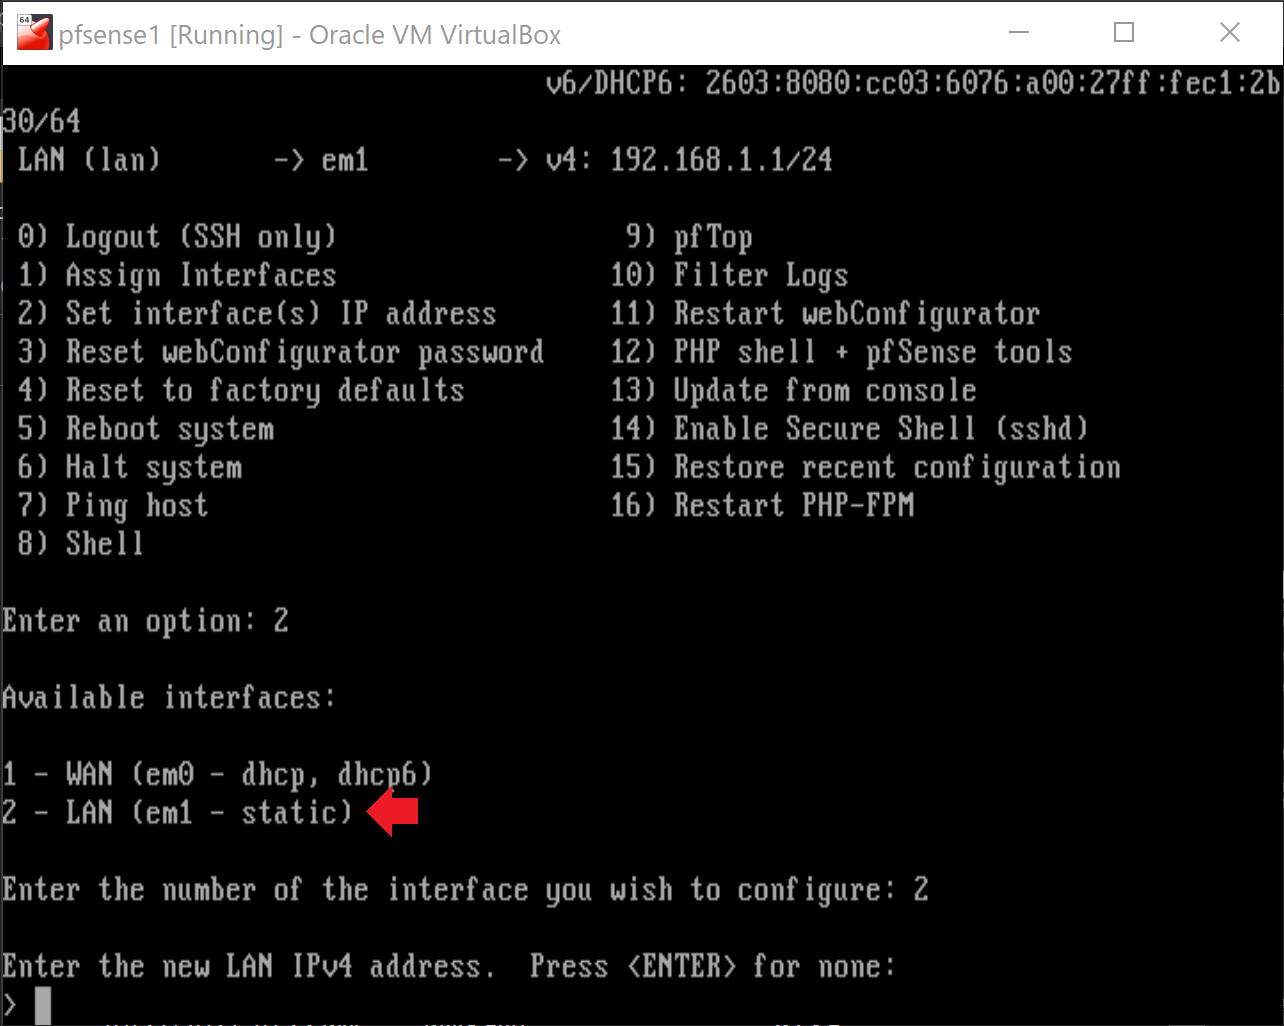
Now we will configure Pfsense to work with our virtual network. We need to set a new interface. Choose 2 to set an interface IP address.

Step 22:
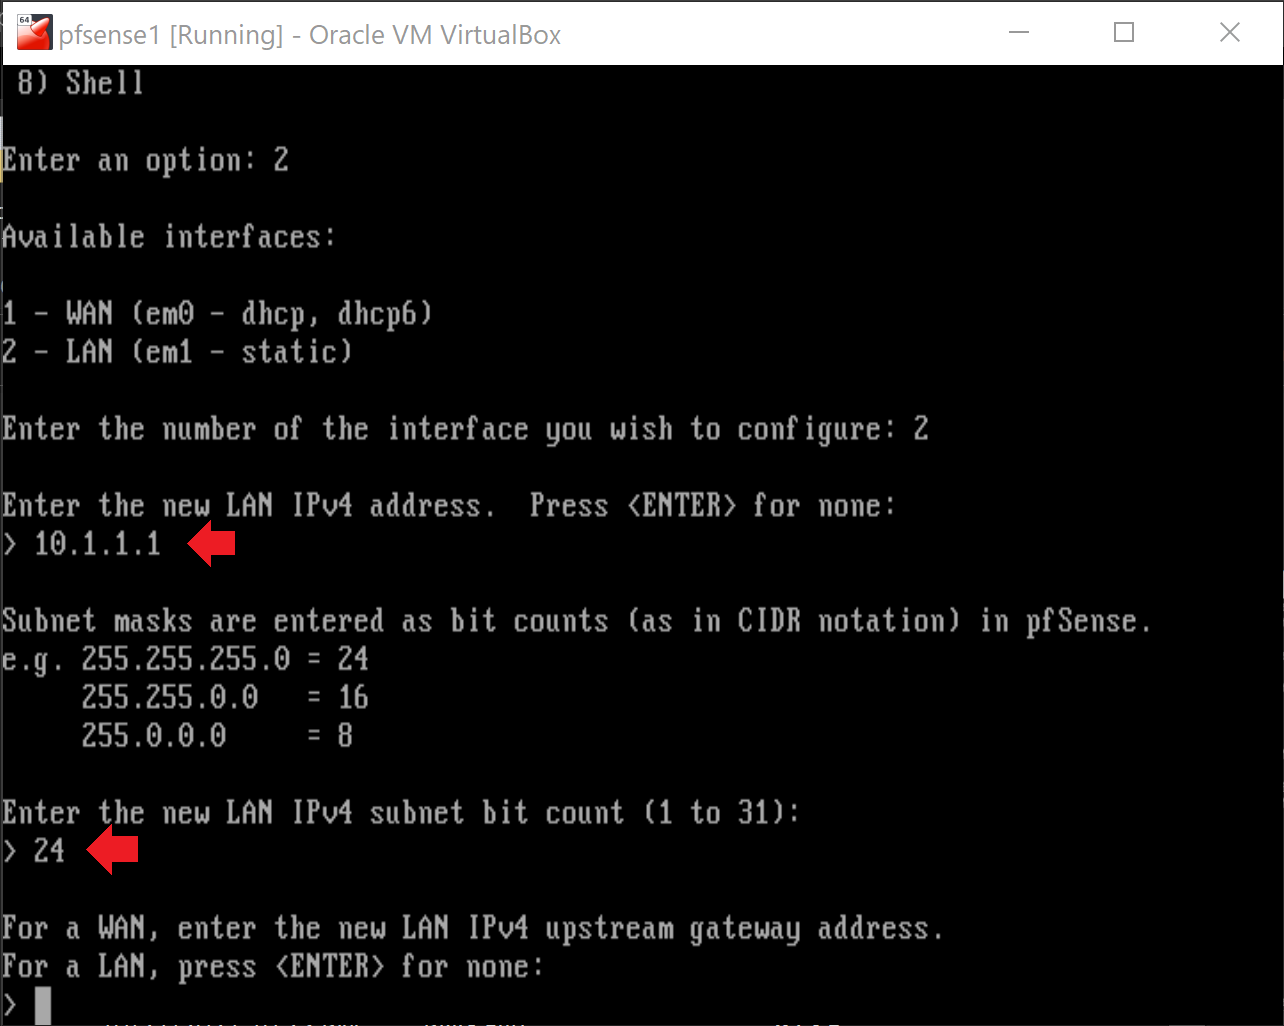
We will be using a LAN. Select 2. and then enter a new LAN IPv4 address. I chose to use 10.1.1.1.
Step 23:
Enter a subnet bit count. I entered in 24. Hit enter twice.
Step 24:
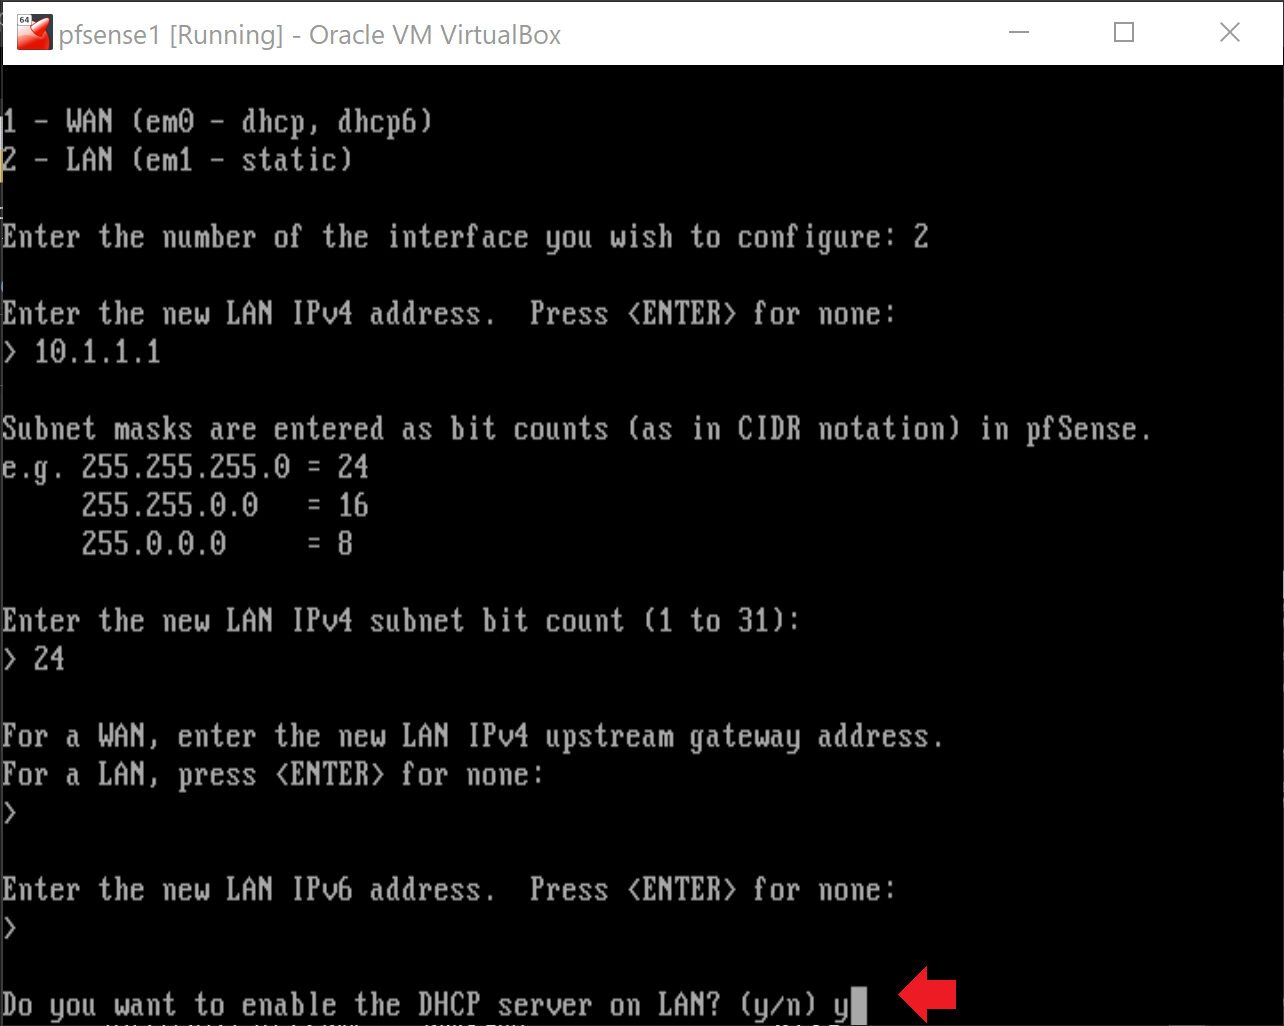
Continue to hit enter until you are asked if you want to enable the DHCP server. Type y for yes.
Step 25:
Enter in your start and end IPv4 address range.

Step 26:
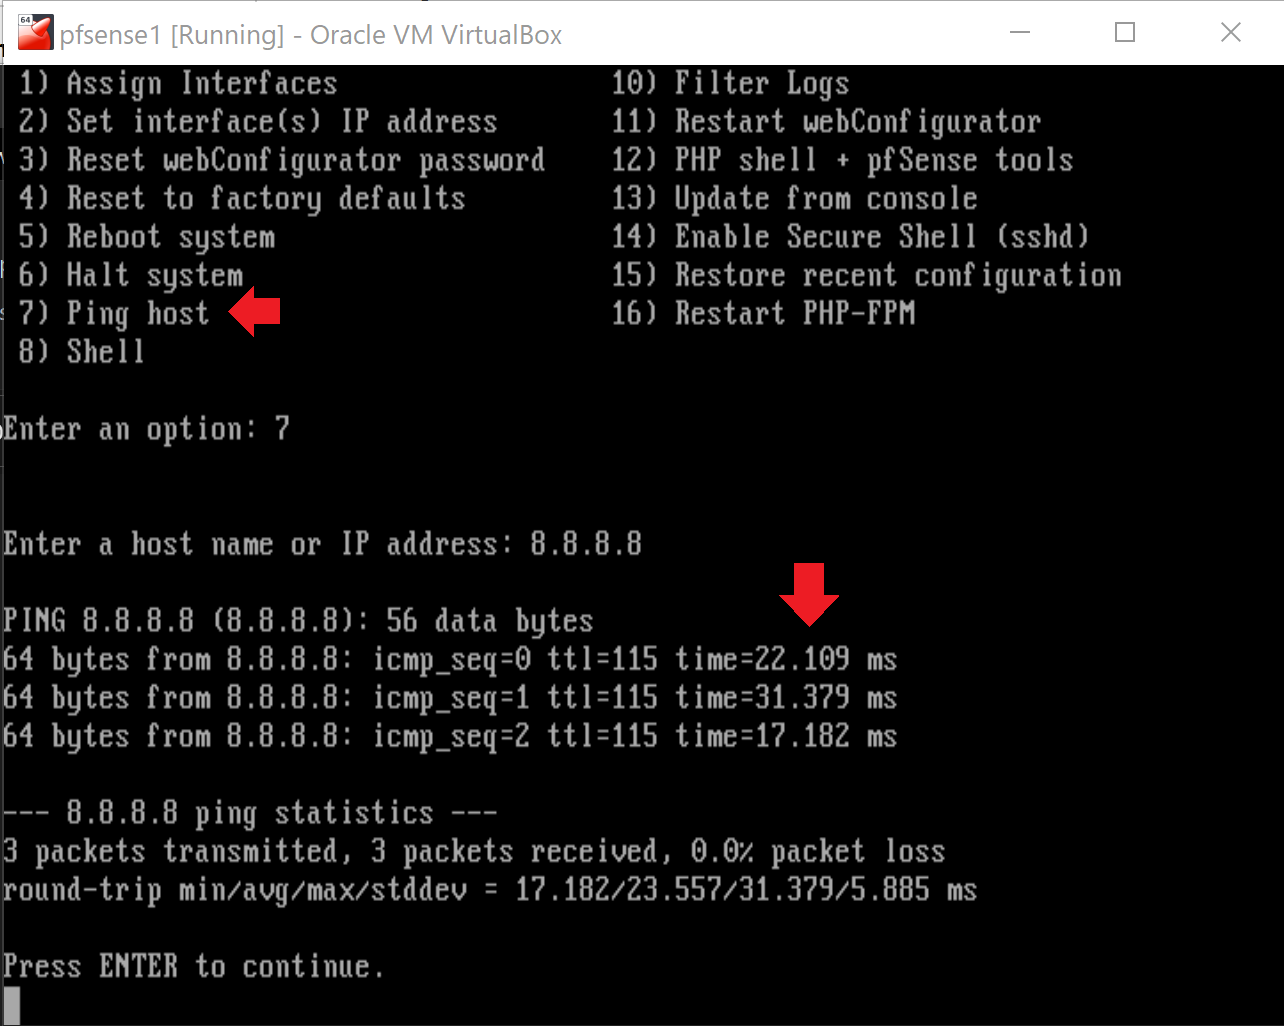
Let’s test the connection. select 7 to ping host. and type in an IP address to test the connect.
Step 27:
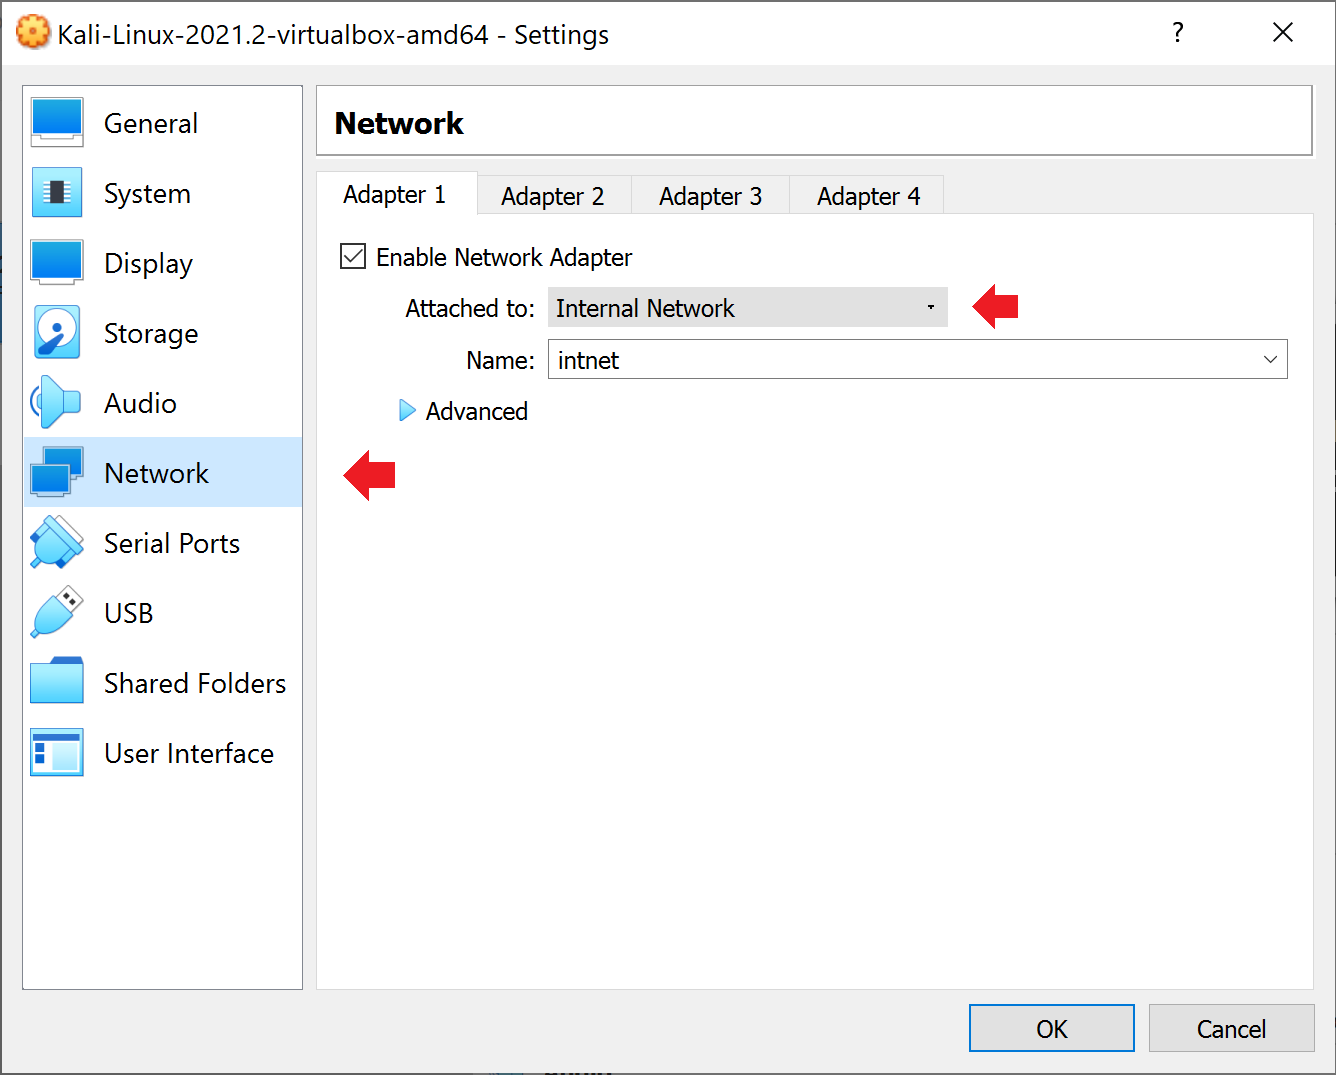
Now we need to set the network adapter for our Kali machine to connect with Pfsense. Select network and change attached to to Internal Network. Just like the 2nd adapter for Pfsense.
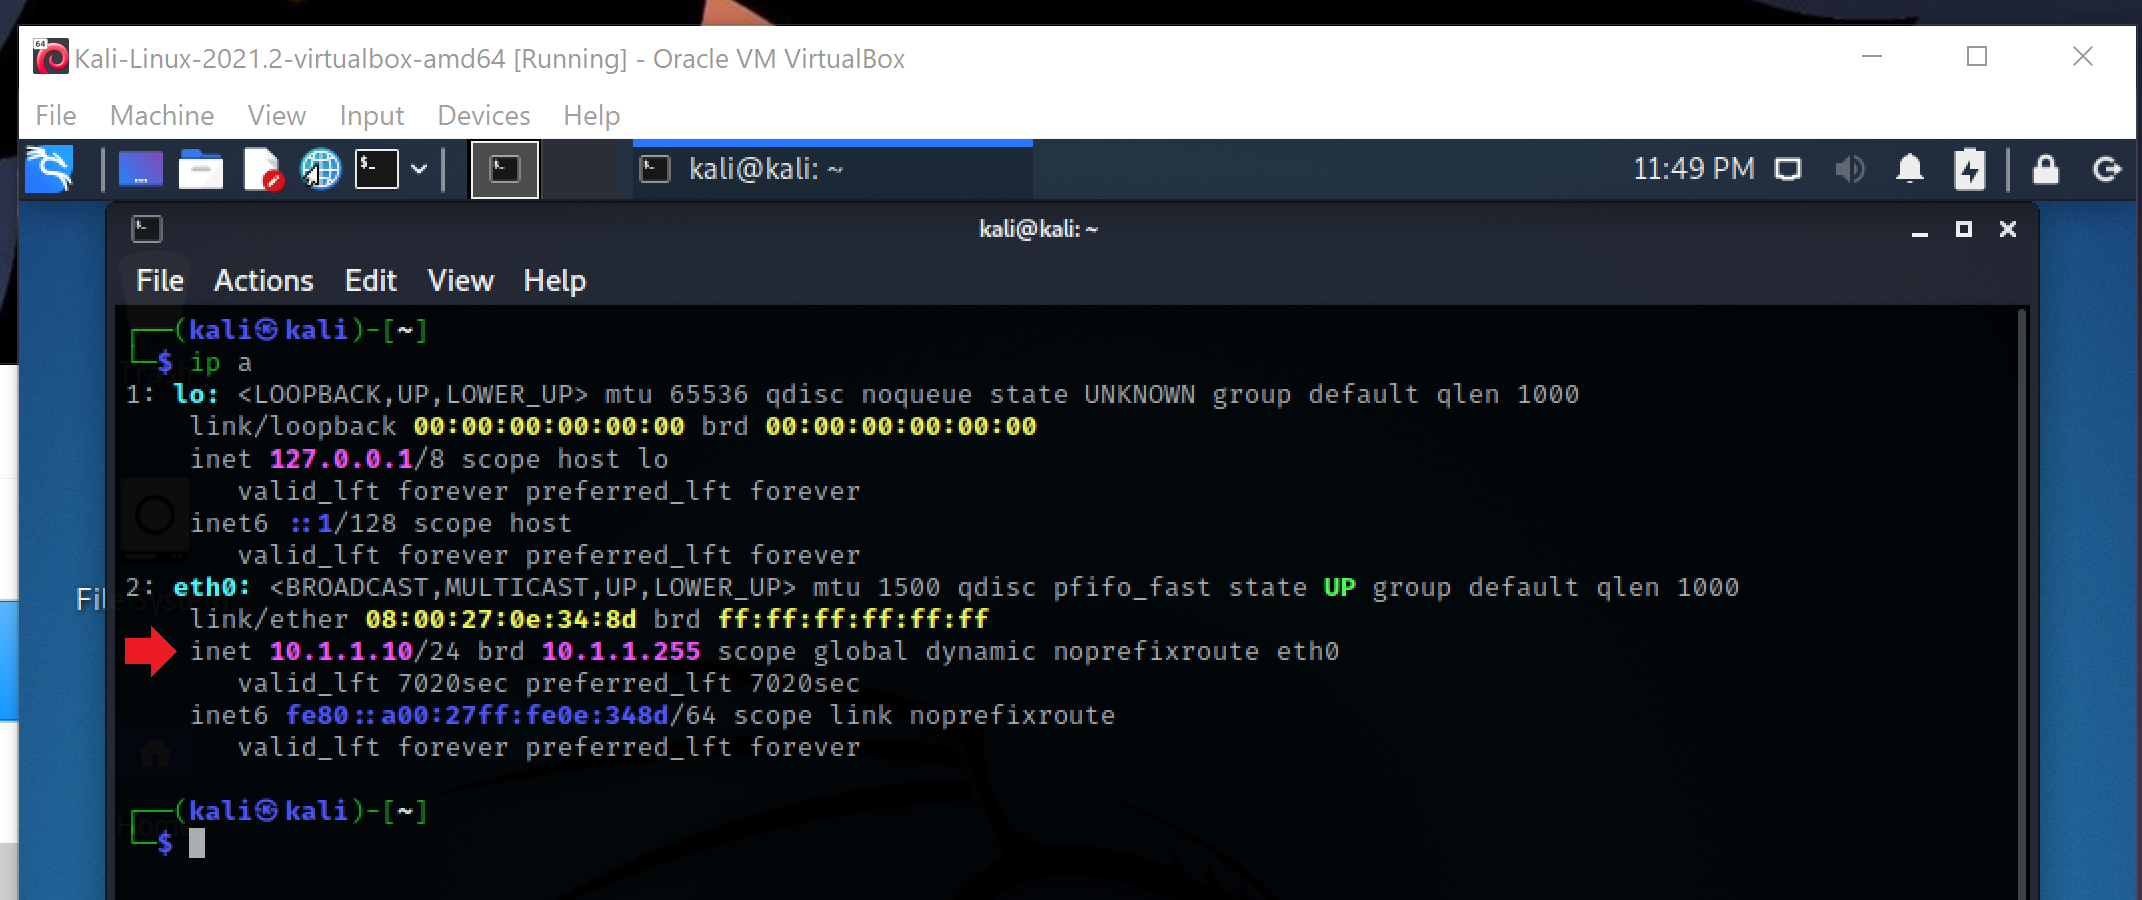
Step 28:
Start up your Kali machine and check your IP address. In my example you can see my Kali machine has pulled an IP address from Pfsense DHCP server.
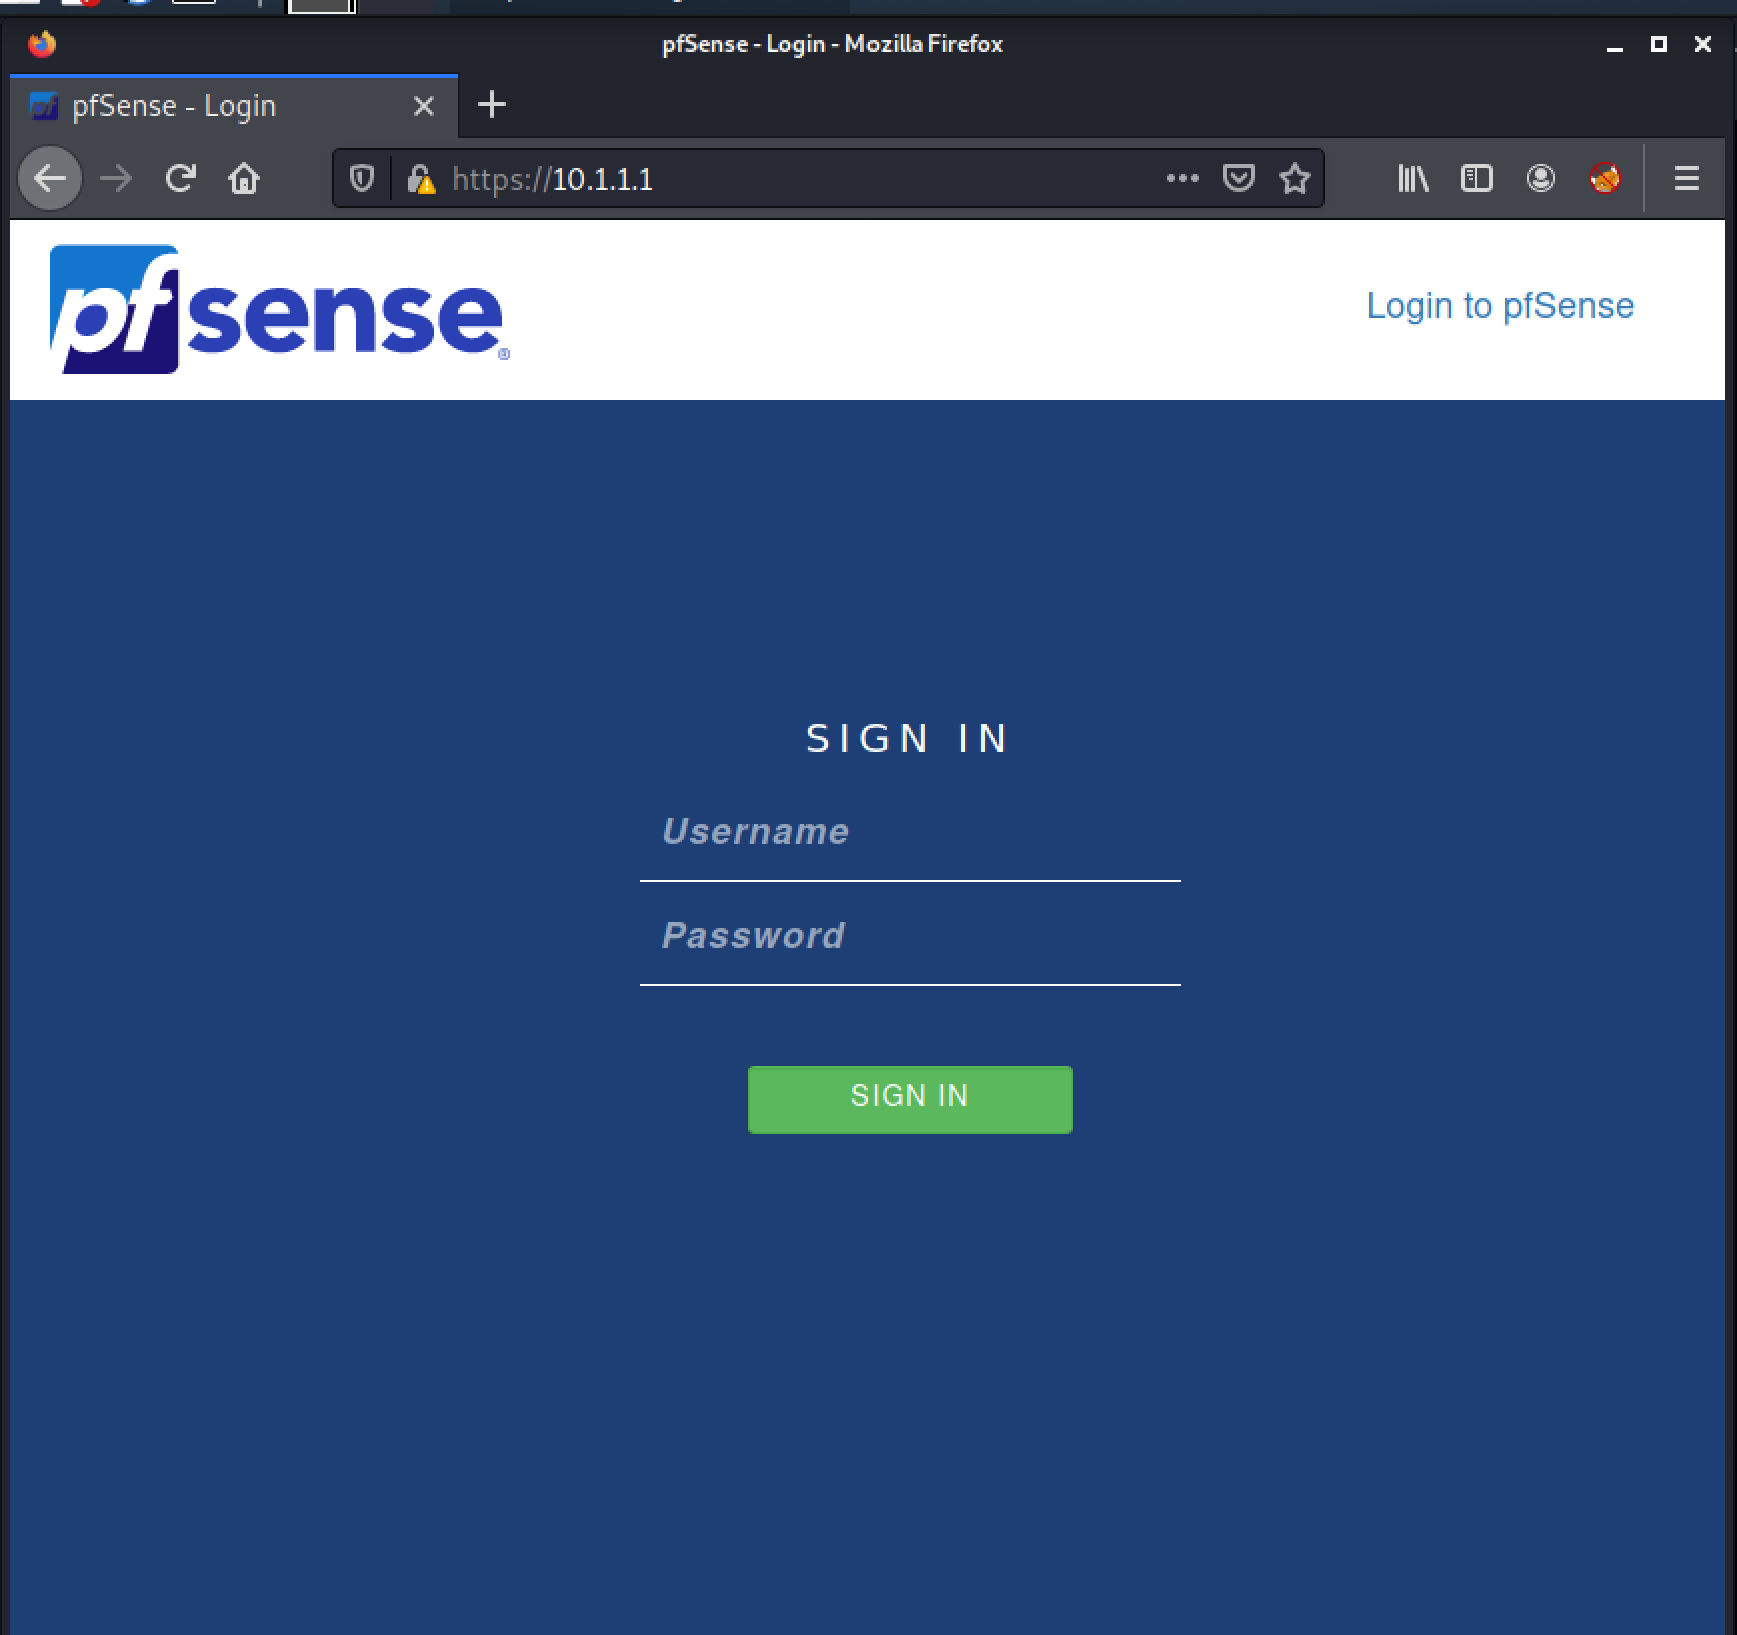
Step 29:
The last thing you need to do is log into the Pfsense GUI. The default login and password are admin and pfsense. I left all of the settings default minus changing the timezone.